
 Pin it
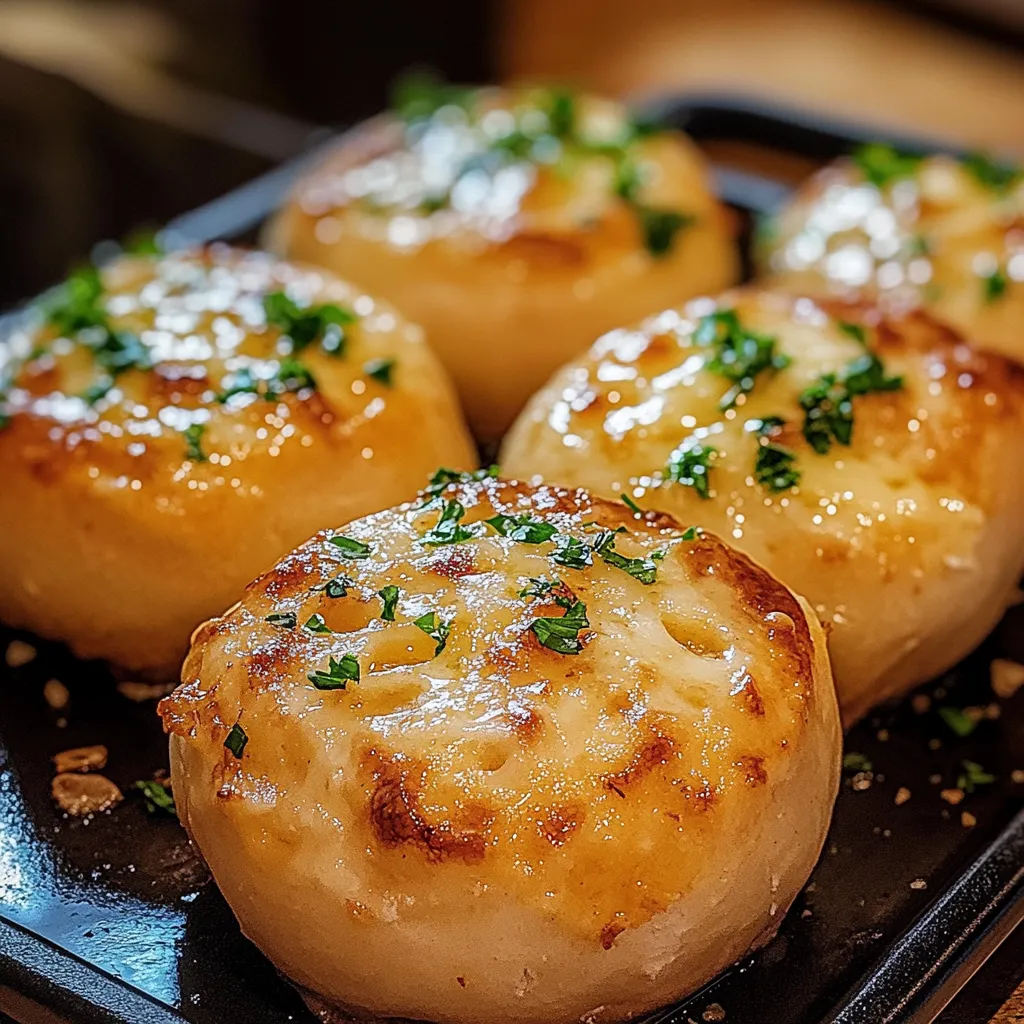
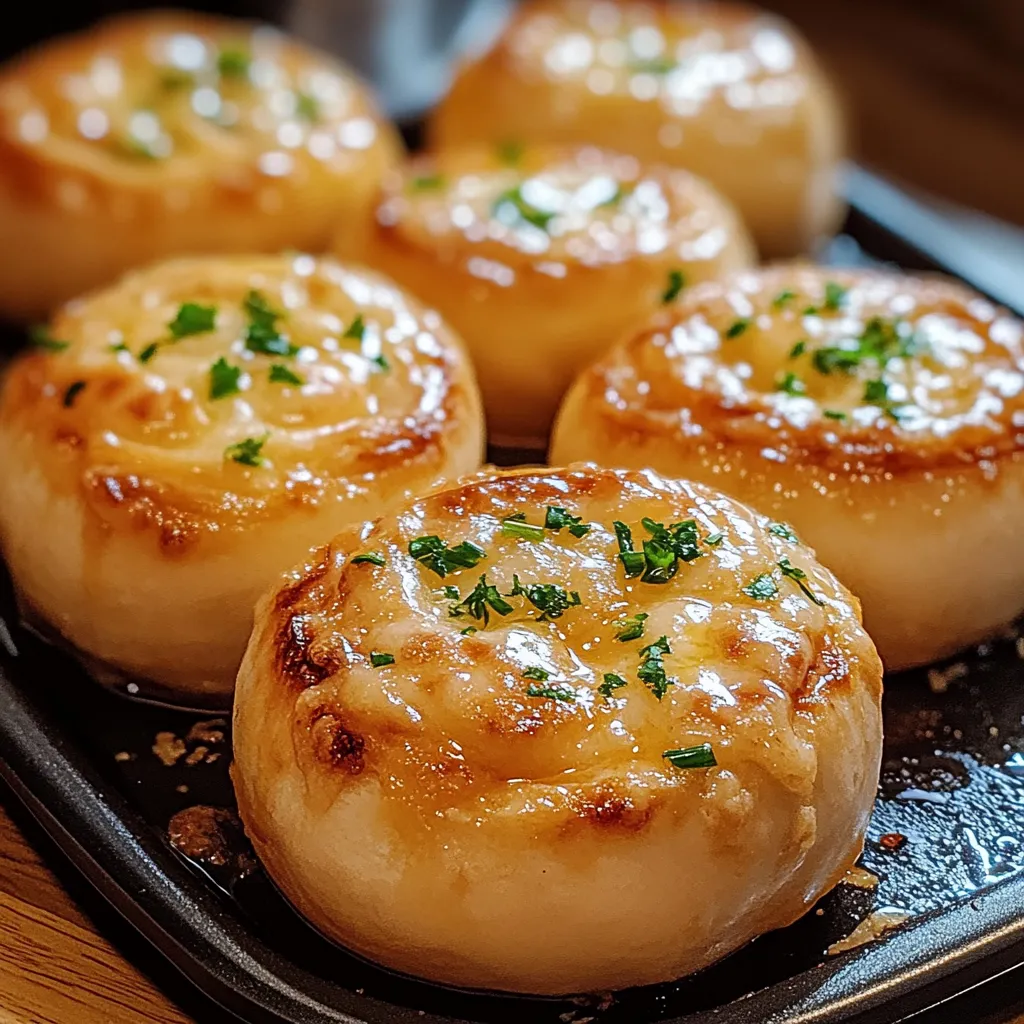
This hearty garlic butter bread roll recipe has been my family's dinnertime staple for years. The combination of soft, pillowy bread with rich garlic butter creates an irresistible aroma that fills the kitchen and brings everyone to the table before dinner is even served.
I first developed this recipe when trying to recreate the famous garlic knots from our favorite Italian restaurant. After several attempts, these rolls became even more requested than the main dishes they were meant to accompany.
Ingredients
- All-purpose flour: Makes the perfect base for soft, fluffy rolls. Look for unbleached flour for the best flavor.
- Instant yeast: Gives a reliable rise without the need for proofing. I recommend SAF or Fleischmann's brands.
- Sugar: Feeds the yeast and adds subtle sweetness. Light brown sugar works wonderfully too.
- Warm water: At exactly 110°F activates the yeast without killing it. Use a thermometer for precision.
- Unsalted butter: Allows you to control the salt level. Always use high-quality butter for the best flavor.
- Fresh garlic cloves: Provide that intense aromatic flavor. Choose firm bulbs with tight skin.
- Fresh parsley: Brightens the buttery flavor. Italian flat-leaf variety offers more flavor than curly.
- Garlic powder: Reinforces the fresh garlic flavor. Look for brands without added fillers.
- Parmesan cheese: Adds a savory, nutty finish. Freshly grated tastes significantly better than pre-packaged.
Step-by-Step Instructions
- Activate Yeast:
- Pour warm water (110°F) into a large mixing bowl and add sugar. Sprinkle the instant yeast over the surface and let it sit undisturbed for 5-7 minutes. You should see a foamy layer forming on top which indicates the yeast is active and ready to work. If your mixture doesn't foam, your yeast might be old or your water temperature was incorrect.
- Make Dough:
- Add flour and salt to the yeast mixture and stir using a wooden spoon until the mixture forms a shaggy dough. Turn the dough onto a lightly floured surface and knead for about 8-10 minutes until smooth and elastic. The dough should spring back when you press it with your finger. If using a stand mixer, mix with the dough hook attachment for 5-7 minutes on medium speed until the dough pulls away from the sides of the bowl.
- First Rise:
- Transfer the dough to a large greased bowl, turning once to coat all sides with oil. Cover with a damp kitchen towel or plastic wrap and place in a warm, draft-free location. Allow the dough to rise until doubled in size, approximately 1-1.5 hours. The ideal rising temperature is around 75-80°F. In colder kitchens, place the bowl near a warm oven or use the proofing setting if your oven has one.
- Prepare Garlic Butter:
- While the dough rises, melt butter in a small saucepan over low heat. Add minced garlic, garlic powder, and salt. Gently simmer for 2-3 minutes to infuse the flavors, being careful not to brown the garlic which can become bitter. Remove from heat and stir in the chopped fresh parsley. Set aside to cool slightly but remain liquid.
- Shape the Rolls:
- Once the dough has doubled in size, gently punch it down to release excess air bubbles. Turn the dough onto a lightly floured surface and divide it into 12 equal portions. For perfectly even rolls, use a kitchen scale. Roll each piece between your palms to form a smooth ball. Place the balls in a greased 9x13 inch baking dish, arranging them with a small amount of space between each.
- Second Rise:
- Cover the shaped rolls with a clean kitchen towel and allow them to rise again for 30-45 minutes. During this second rise, the rolls should puff up and begin to touch each other. This creates the classic pull-apart texture when baked.
- Preheat and Bake:
- About 20 minutes before the second rise completes, preheat your oven to 375°F to ensure it reaches the proper temperature. Just before baking, gently brush the tops of the rolls with half of the garlic butter mixture, making sure to get some of the minced garlic pieces on each roll. Bake in the preheated oven for 20-25 minutes until the tops are golden brown and the internal temperature reaches 190°F.
- Finish with Garlic Butter:
- Immediately after removing the rolls from the oven, brush the remaining garlic butter over the hot rolls. The heat will help the butter absorb into the bread. If using Parmesan cheese, sprinkle it over the tops now so it slightly melts from the residual heat.
 Pin it
My secret ingredient is actually the combination of both fresh garlic and garlic powder. I discovered this dual approach after years of testing various garlic bread recipes. The fresh garlic provides bright, aromatic notes while the powder offers that deep, roasted garlic undertone that makes these rolls so addictive.
Make-Ahead Options
These garlic butter rolls can be prepared up to the shaping stage, then covered and refrigerated overnight. Simply remove them from the refrigerator about 1-2 hours before baking to allow for the second rise. This makes them perfect for holiday dinners when oven space and timing are at a premium. The dough can also be frozen after the first rise. Divide into portions, freeze on a baking sheet until solid, then transfer to freezer bags. Thaw overnight in the refrigerator before shaping and continuing with the recipe.
Ingredient Substitutions
Whole wheat flour can replace up to half of the all-purpose flour for a nuttier flavor and increased fiber, though the rolls will be slightly denser. For a dairy-free version, substitute the butter with olive oil and omit the Parmesan. Dried herbs can replace fresh in a pinch use 2 teaspoons dried parsley instead of 2 tablespoons fresh. If you prefer a sweeter roll, increase the sugar to 2 tablespoons and add a honey butter glaze after baking.
Serving Suggestions
These garlic butter rolls pair beautifully with pasta dishes, particularly those with red sauce where the rolls can soak up every last bit of flavor. They also make an excellent accompaniment to soups and stews during colder months. For an impressive appetizer, pull apart individual rolls and serve with a small bowl of warm marinara sauce for dipping. When serving as part of a larger meal, I place the entire pan of rolls in the center of the table for a family-style presentation that encourages sharing.
 Pin it
These garlic butter rolls are truly restaurant quality and will elevate your mealtime experience.
Frequently Asked Questions
- → Can I make the dough ahead of time?
Yes! You can prepare the dough up to 24 hours in advance and store it in the refrigerator. This slow rise actually enhances flavor development. When ready to bake, allow the dough to come to room temperature before shaping rolls and proceeding with the second rise.
- → How do I know when the rolls are properly baked?
The rolls should be golden brown on top and sound hollow when tapped on the bottom. An internal temperature of 190°F (88°C) indicates they're perfectly baked. If they're browning too quickly but not fully baked, cover loosely with foil.
- → Can I freeze these bread rolls?
Absolutely! Cool completely, then wrap individually in plastic wrap and place in a freezer bag. Freeze for up to 3 months. Thaw at room temperature and reheat in a 350°F oven for 5-7 minutes. For best results, add fresh garlic butter after reheating.
- → What can I serve with garlic butter bread rolls?
These rolls pair beautifully with pasta dishes, soups, stews, and roasted meats. They're perfect for sopping up sauces and gravies. For an elegant appetizer, serve warm with additional dipping oils or compound butters.
- → Can I use active dry yeast instead of instant?
Yes, but you'll need to modify the process slightly. Dissolve the active dry yeast in the warm water with sugar and let it proof for 10 minutes until foamy before adding the remaining ingredients. You may need an extra 15-30 minutes for rising times.
- → How do I store leftover rolls?
Store cooled rolls in an airtight container at room temperature for up to 2 days. To refresh, sprinkle with a few drops of water and heat in a 350°F oven for 5 minutes. For longer storage, freeze as directed above.