
 Pin it
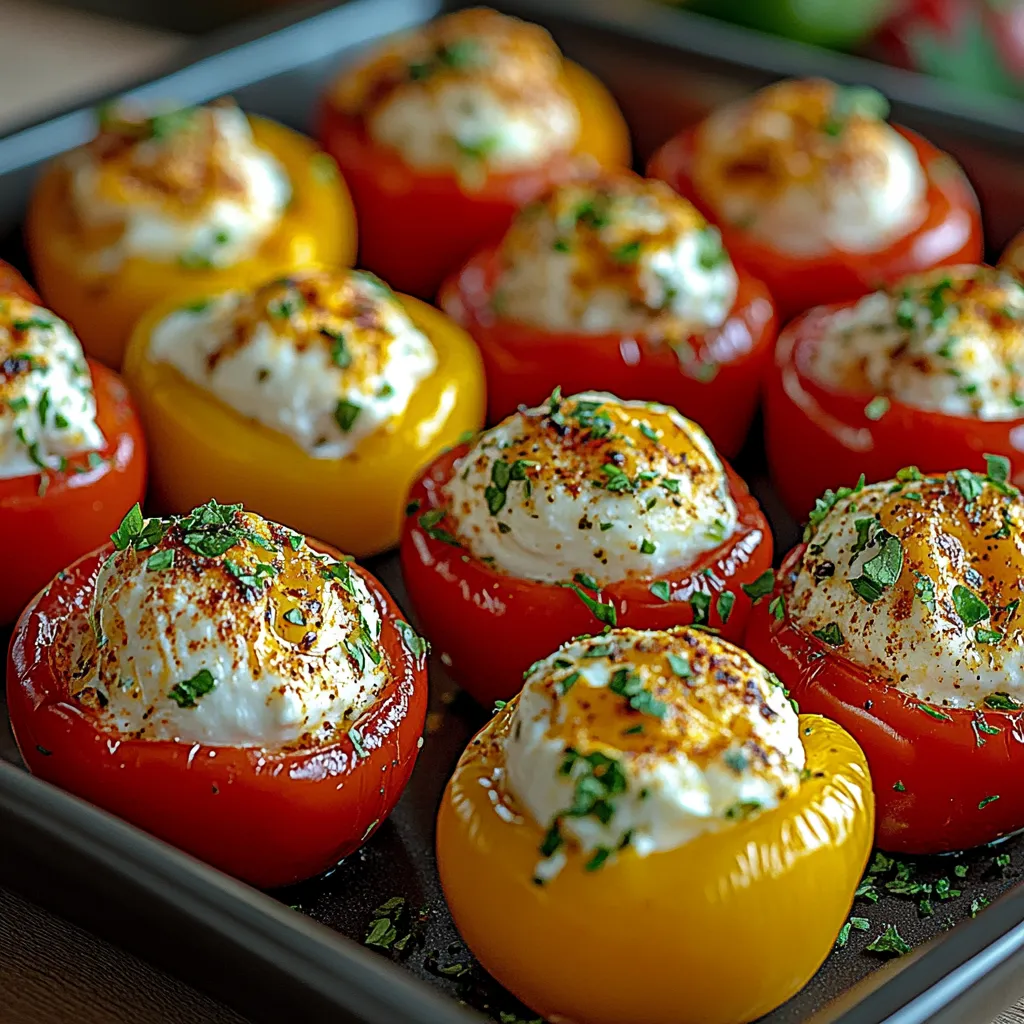
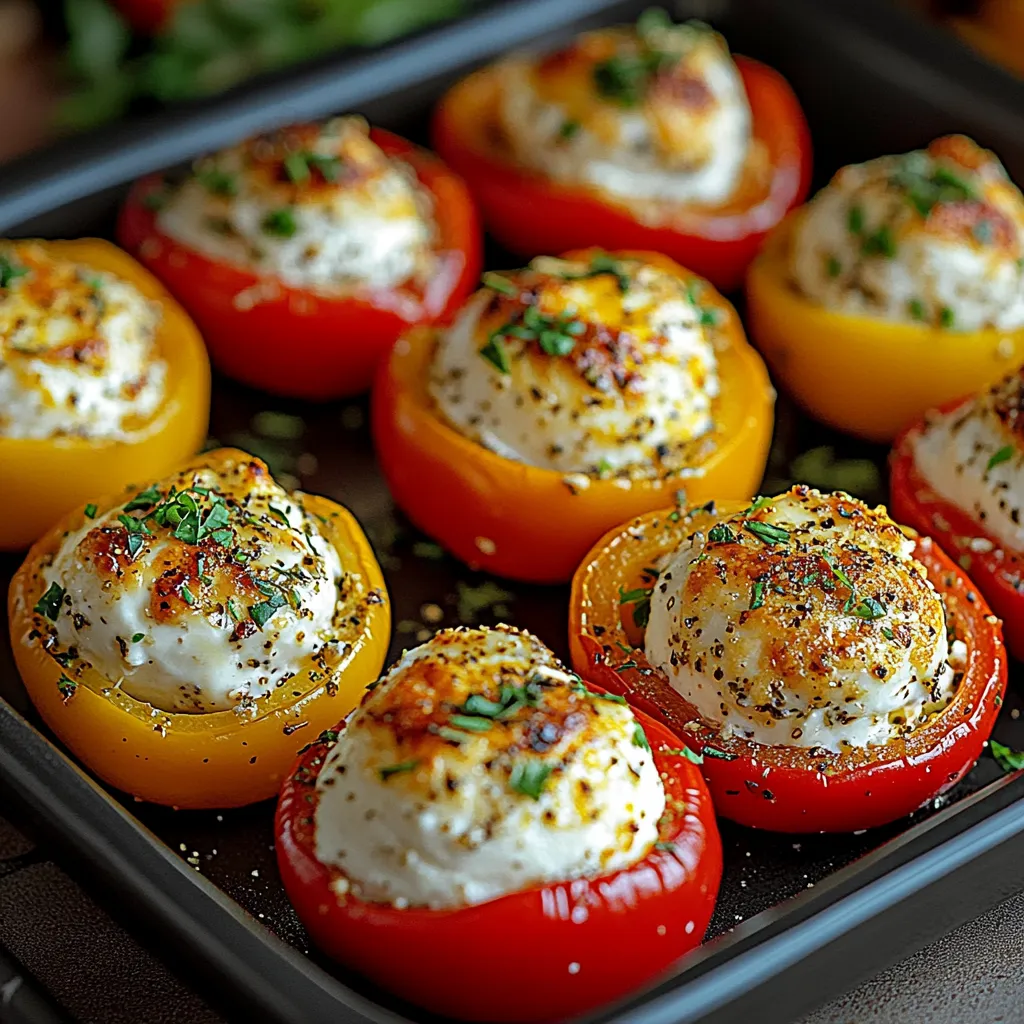
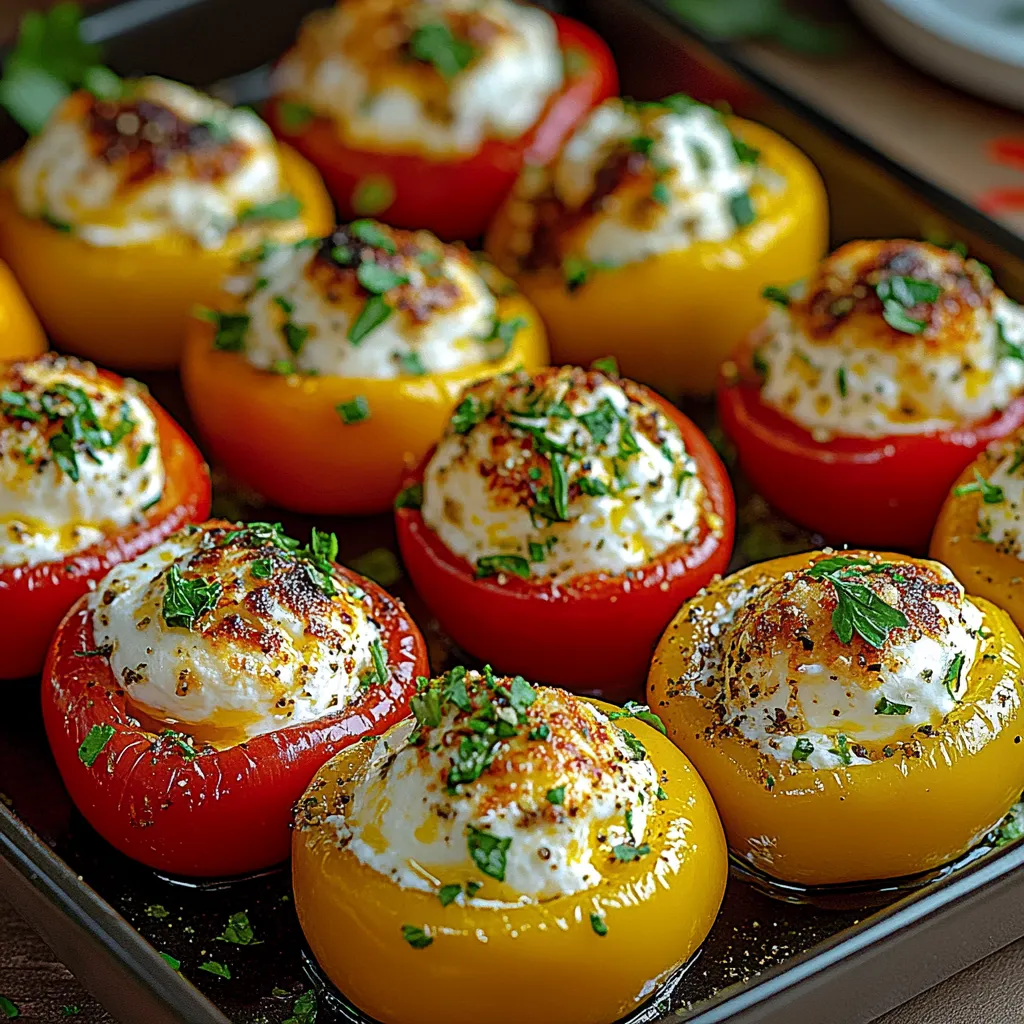
These cream cheese and herb stuffed mini peppers are my go to appetizer for any gathering when I want something that looks beautiful but keeps prep easy. The colorful peppers cradle a creamy filling packed with fresh herbs and a pop of garlic flavor. Just a quick bake in the oven and you have a warm vibrant bite sized snack guests always rave about.
I still remember serving these at my friend’s birthday potluck last summer and they were gone before anything else on the table. Now I always make a double batch if I am hosting a crowd
Ingredients
- Mini sweet peppers: Choose firm peppers that feel heavy for their size these will hold the filling better and have great flavor
- Cream cheese: Softened so it mixes easily and turns light and fluffy
- Shredded mozzarella cheese: Adds that stretchy melt and a touch of mildness look for whole milk mozzarella for the richest taste
- Fresh parsley: Brings a pop of green and fresh aroma flat leaf parsley is best but curly works too
- Fresh chives: Give oniony zip and lovely color use snipped fresh chives for the best flavor
- Garlic: Minced fresh always makes a difference for that gentle garlic punch jarred garlic can be used in a pinch
- Lemon juice: Brightens the filling and balances the richness freshly squeezed is worth it
- Salt and pepper: To taste season with a light hand and taste as you go
- Smoked paprika: Brings gentle warmth and a hint of smokiness Spanish smoked paprika is especially fragrant and flavorful
- Extra virgin olive oil: For drizzling adds a luscious finish use a robust olive oil to complement the fresh herbs
Step-by-Step Instructions
- Preheat the Oven:
- Set your oven to three hundred seventy five degrees Fahrenheit and let it heat fully Bake times are most reliable with a hot even oven
- Prepare the Peppers:
- Wash and dry mini sweet peppers Slice each lengthwise and carefully scoop out seeds and membranes I like to leave the stems on half of the peppers for visual appeal Arrange cut side up on a parchment lined baking sheet with a little space between each
- Make the Filling:
- Place softened cream cheese in a medium mixing bowl Use a fork to break it up and then add shredded mozzarella chopped parsley chopped chives minced garlic lemon juice a pinch of salt cracked pepper and smoked paprika if using Stir vigorously with a spoon or spatula until no streaks remain and the mixture is very smooth and fluffy
- Stuff the Peppers:
- Using a small spoon or piping bag fill each pepper half with a generous mound of the cheese and herb mixture Take care not to overfill to prevent any spillage during baking but do fill to the edges for a nice look
- Bake:
- Drizzle a little extra virgin olive oil across the tops of the stuffed peppers This helps the filling brown and adds flavor Slide the tray into your preheated oven Bake between fifteen and twenty minutes until the peppers are soft and the filling has a touch of golden color on top If your oven runs hot check at fifteen minutes
- Cool and Serve:
- Let the baked peppers rest on the tray for a few minutes before transferring to a serving platter This keeps the filling firm and easy to eat Serve these as a warm appetizer or let them come to room temperature for hassle free party nibbling
 Pin it
Parsley is my personal favorite here It brings a fresh flavor that reminds me of my grandmother’s garden I once picked every herb for this dish straight from her backyard and it made each bite extra meaningful
Storage Tips
These peppers store best in an airtight container in the fridge The texture stays creamy for two days Rewarm gently in the oven or let them come to room temp for best results Leftovers rarely last long at my house
Ingredient Substitutions
You can swap the mozzarella for shredded cheddar or Monterey Jack for a sharper twist No fresh parsley Use dill or basil or a mix of your favorite tender herbs If you want more heat try mixing in a chopped jalapeno without the seeds
Serving Suggestions
These peppers are a top pick for brunches gatherings and picnics I love stacking them on a big platter with a bunch of fresh greens They pair especially well with crisp white wine or a fruity sparkling beverage If you are making them as part of a buffet include them next to dips and fresh veggies for color
 Pin it
These colorful mini peppers bring vibrant flavor and are sure to impress at any gathering.
Frequently Asked Questions
- → Can I make these stuffed mini peppers ahead of time?
Yes! You can prepare the stuffed peppers up to 24 hours in advance. Simply assemble them, cover with plastic wrap, and refrigerate. When ready to serve, bring them to room temperature for about 15 minutes before baking.
- → What can I substitute for fresh herbs?
If fresh herbs aren't available, you can substitute dried herbs at a ratio of 1:3 (1 teaspoon dried for every tablespoon fresh). For this dish, use about 4 teaspoons dried parsley and 4 teaspoons dried chives instead of the fresh amounts.
- → Can I make these stuffed peppers vegetarian or vegan?
These peppers are already vegetarian. For a vegan version, substitute the cream cheese and mozzarella with dairy-free alternatives like vegan cream cheese and vegan shredded cheese. The texture will be slightly different but still delicious.
- → How do I store leftover stuffed mini peppers?
Store any leftover stuffed peppers in an airtight container in the refrigerator for up to 3 days. Reheat them in a 350°F oven for about 10 minutes or until warmed through, or enjoy them cold straight from the refrigerator.
- → What can I serve with these stuffed mini peppers?
These peppers work wonderfully as part of an appetizer spread with items like bruschetta, olive tapenade, and charcuterie. They also complement grilled meats or can be served alongside a fresh green salad for a light meal.
- → Can I freeze stuffed mini peppers?
While possible, freezing isn't ideal as the peppers may become soggy when thawed. If you must freeze them, do so before baking. Freeze in a single layer, then transfer to a freezer bag. Bake from frozen, adding 5-10 minutes to the cooking time.