
 Pin it
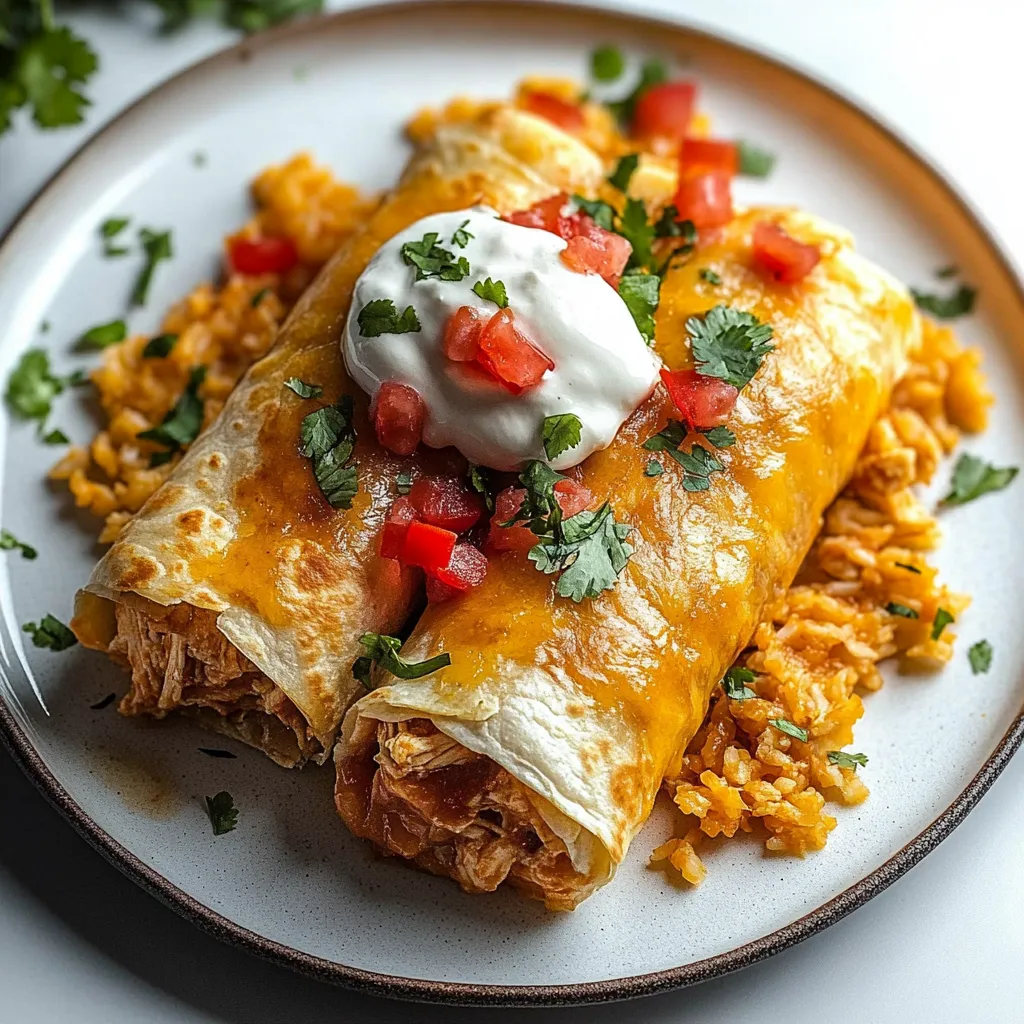
This hearty chicken chimichanga recipe has transformed my weeknight dinner rotation with its perfect balance of crispy exterior and flavorful, cheesy filling. After years of ordering chimichangas at restaurants, I finally perfected this homemade version that rivals any I've tried.
I first made these chimichangas during a busy week when I needed something quick that would satisfy my entire family. The look on my husband's face when he bit into the crispy shell convinced me this recipe needed to become a regular in our home.
Ingredients
- Shredded chicken: Provides the perfect protein base and absorbs all the seasonings beautifully
- Avocado oil: Has a high smoke point making it ideal for achieving that golden crispy exterior
- Monterey Jack cheese: Melts perfectly and provides that stretchy cheese pull everyone loves
- Oaxaca cheese: Adds an authentic Mexican touch with its mild buttery flavor
- Refried beans: Create a creamy layer that helps bind everything together
- Lime juice: Brightens all the flavors and cuts through the richness
- Flour tortillas: Burrito size work best as they're sturdy enough to hold all the filling
Step-by-Step Instructions
- Prepare the Filling:
- Cook diced onion in avocado oil over medium heat until translucent and slightly golden around the edges, about 4 minutes. This creates a sweet foundation for the filling. Add your shredded chicken along with the chili powder, cumin, paprika, salt and pepper. Make sure to toast the spices with the chicken for about 2 minutes to release their aromatic oils and enhance the flavor profile.
- Create the Cheese Mixture:
- Transfer your seasoned chicken to a mixing bowl and immediately add both cheeses while the chicken is still hot. The residual heat will gently melt the cheese without making it stringy or separated. Fold in the salsa verde and lime juice, making sure everything is evenly incorporated. The mixture should be moist but not soggy.
- Assemble with Care:
- Lay each tortilla flat on a clean work surface. Spread a thin, even layer of refried beans in the center, leaving about a 2-inch border around the edges. The beans act as a barrier between the tortilla and the moist filling, preventing sogginess. Scoop approximately half cup of the chicken mixture onto the beans, slightly flattening it. Fold the sides in first, then the bottom, and roll tightly to create a secure package. The key is rolling firmly enough to keep everything contained but not so tight that the tortilla tears.
- Perfect the Frying Technique:
- Heat avocado oil in a heavy skillet until shimmering but not smoking. Place each chimichanga seam side down first to seal it closed. Allow each side to develop a deep golden color before turning, approximately 2 minutes per side. Use tongs to carefully rotate the chimichanga to ensure even browning on all surfaces. The perfect chimichanga has a uniformly crispy exterior with no soft spots.
 Pin it
The chili powder is my secret ingredient in this recipe. I actually mix my own blend using ancho, guajillo, and chipotle peppers which gives these chimichangas a depth of flavor you simply cannot get from store bought varieties. My grandmother taught me this technique, and it makes all the difference.
Make Ahead Options
These chimichangas work wonderfully as a make ahead meal. Prepare the filling up to three days in advance and store it in an airtight container in the refrigerator. When ready to serve, simply reheat the filling, assemble, and fry your chimichangas. The flavors actually develop and improve with time, making this an excellent option for busy weeknight planning.
Serving Suggestions
While these chimichangas are delicious on their own, they truly shine when served with complementary sides. I like to create a full Mexican feast with Spanish rice, black beans, and a fresh tomato salad. For a lighter option, serve with a crisp cabbage slaw dressed with lime juice and a touch of honey. The cool, crunchy texture provides the perfect contrast to the hot, crispy chimichangas.
Common Mistakes to Avoid
The most common pitfall when making chimichangas is overfilling the tortillas. Start with less filling than you think you need about one third cup is perfect. Overstuffed chimichangas tend to burst during frying, creating a messy situation. Another mistake is using tortillas straight from the refrigerator. Let them come to room temperature or quickly warm them on a dry skillet to make them more pliable and less likely to crack during rolling.
 Pin it
Serve immediately after frying the ultimate chimichanga experience includes that perfect contrast between the crispy exterior and hot, melty interior.
Frequently Asked Questions
- → Can I bake these chimichangas instead of frying them?
Yes! For a healthier alternative, brush the assembled chimichangas with a little oil and bake at 400°F (200°C) for about 20-25 minutes until golden and crispy. Flip halfway through baking time.
- → What can I substitute for Oaxaca cheese?
If you can't find Oaxaca cheese, you can substitute with mozzarella, which has a similar mild flavor and melty texture. Alternatively, you could use additional Monterey Jack or even mild cheddar.
- → Can I make these chimichangas ahead of time?
You can prepare the filling and assemble the chimichangas a day ahead. Store them wrapped individually in the refrigerator, then fry just before serving. You can also freeze the assembled but unfried chimichangas for up to 1 month.
- → What sides go well with chimichangas?
Spanish rice, Mexican street corn, black beans, or a simple green salad make excellent side dishes. You can also serve with extra guacamole, pico de gallo, and lime wedges for a complete meal.
- → Can I use corn tortillas instead of flour tortillas?
Traditional chimichangas use flour tortillas because they're more pliable and seal better when folded. Corn tortillas tend to crack when folded and don't hold the filling as well, so they're not recommended for this dish.
- → How do I keep the chimichangas from unfolding while frying?
Make sure to roll them tightly and place them seam-side down first when frying. The heat will help seal the edge. You can also secure them with toothpicks while frying, just remember to remove before serving.