
 Pin it
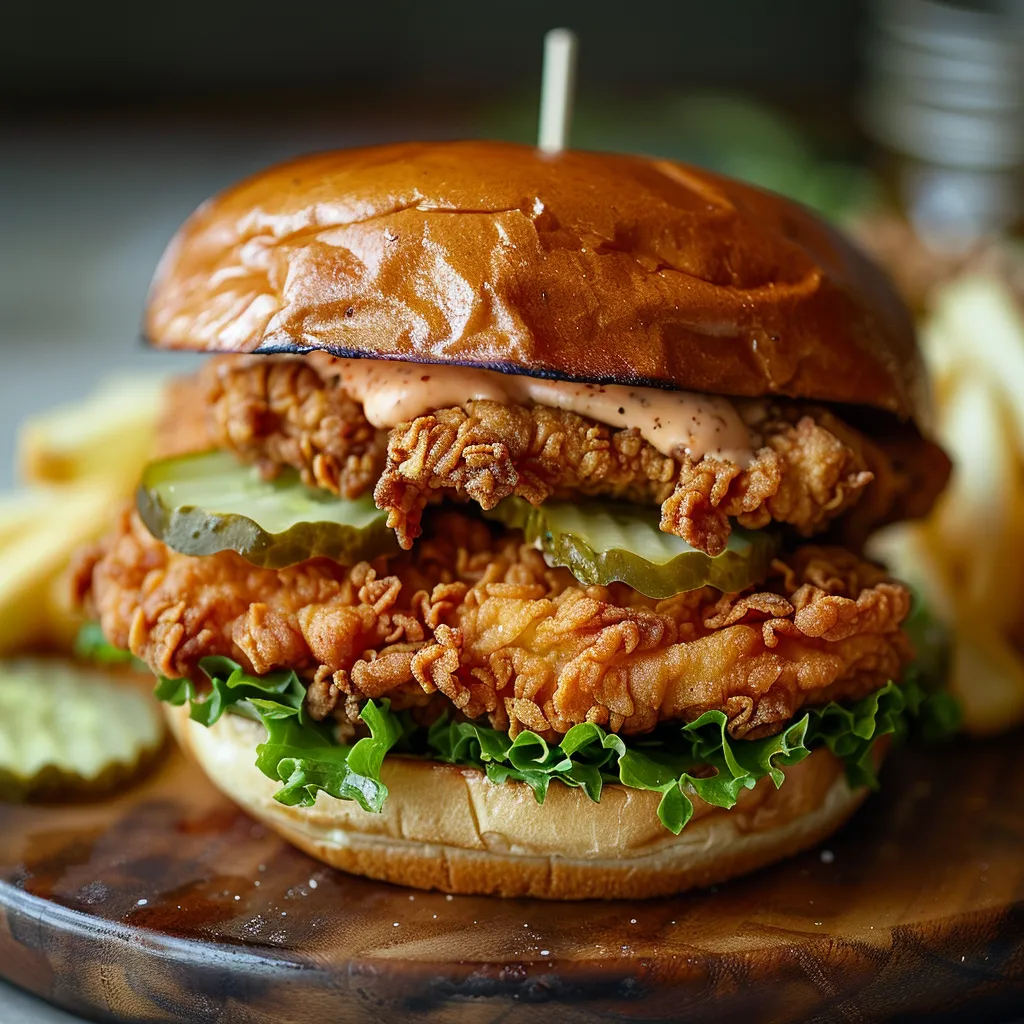
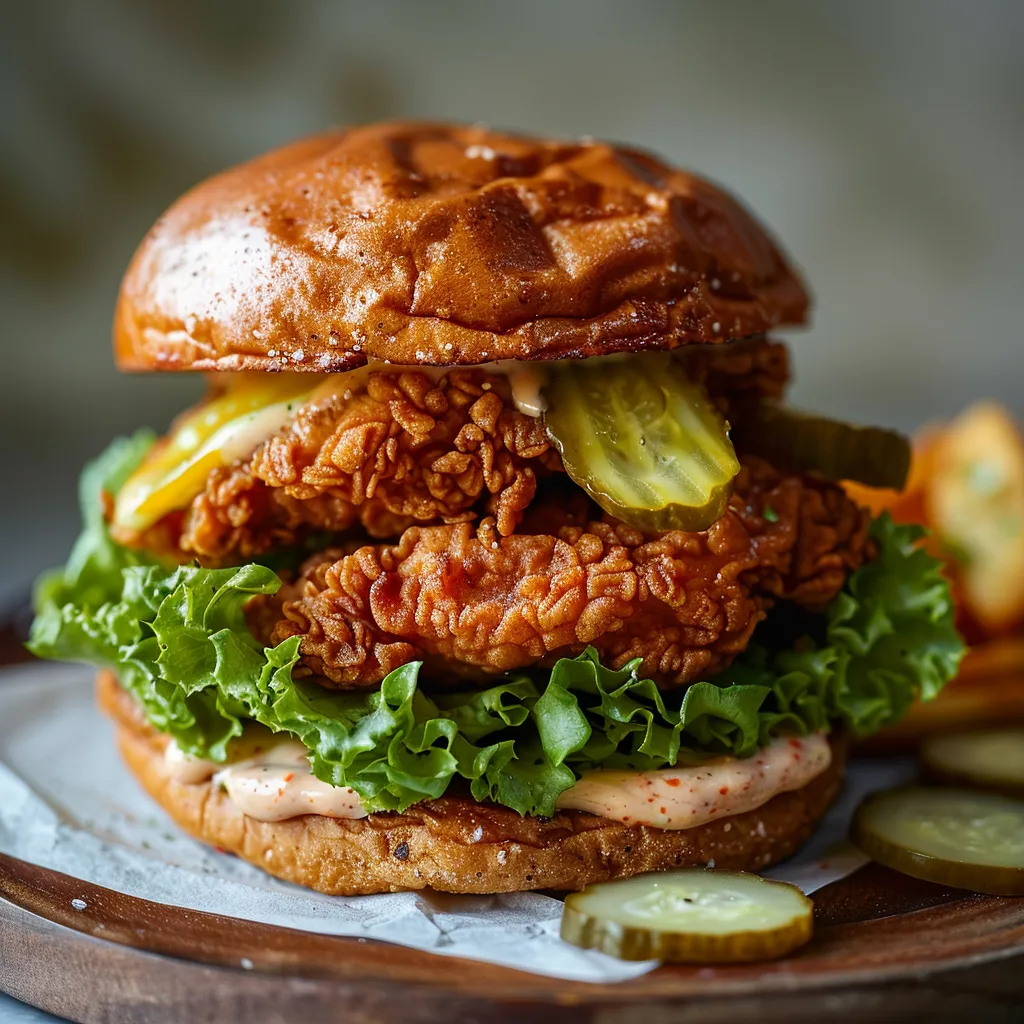
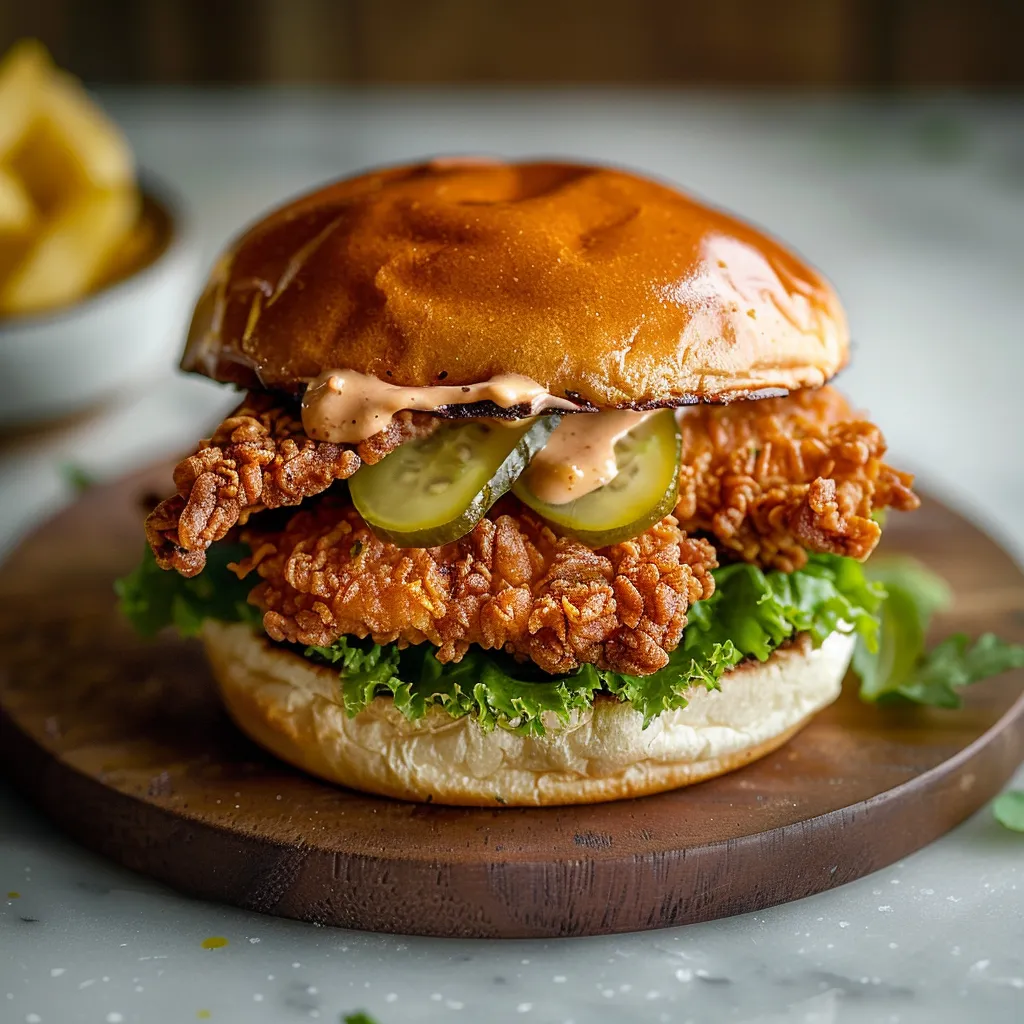
Pickle brined crispy chicken sandwiches deliver that perfect combination of juicy interior and shatteringly crisp exterior that makes fried chicken so irresistible. The secret lies in the tangy pickle juice brine that not only seasons the meat throughout but also creates incredible tenderness. Served on a soft brioche bun with the perfect sauce, this sandwich rivals any fast food version while giving you complete control over ingredients and flavor.
I first discovered pickle brining after hearing about certain fast food chains using this technique. After experimenting with different ratios and timing, this version consistently produces chicken that has everyone at the table falling silent except for the occasional "wow" between bites. My brother in law who considers himself a fried chicken connoisseur declared it better than any restaurant version he's tried.
Brining Foundation Ingredients
- Boneless chicken breasts: Create perfect sandwich portions
- Tangy buttermilk: Tenderizes meat fibers beautifully
- Pickle juice: Provides signature flavor and acidity
- Kosher salt: Ensures proper seasoning throughout
- Sugar: Balances acidity while promoting browning
- Garlic powder: Adds savory depth without chunks
- Black pepper: Provides gentle background warmth
- Cayenne pepper: Contributes controlled heat level
Crispy Coating Components
- All purpose flour: Forms the coating foundation
- Cornstarch: Creates exceptional crispiness when fried
- Powdered sugar: Promotes golden brown color
- Garlic powder: Enhances savory flavor profile
- Kosher salt: Ensures properly seasoned coating
- Black pepper: Adds pleasant spice throughout
- Cayenne pepper: Delivers subtle heat without overwhelming
- Onion powder: Contributes aromatic savory notes
Perfect Preparation
- Chicken Preparation:
- Begin with chicken breasts at room temperature for even cooking. If breasts are very thick, butterfly or pound them to approximately half inch thickness for optimal cooking. This ensures the chicken cooks through before the coating burns.
- Brine Creation:
- Combine buttermilk, pickle juice, and all seasonings in a shallow dish, whisking thoroughly to distribute ingredients evenly. The acidity from pickle juice and buttermilk works to tenderize the meat while infusing flavor. Submerge chicken pieces completely, cover tightly, and refrigerate for minimum one hour or up to eighteen hours for deeper flavor penetration.
- Breading Mixture:
- Whisk flour, cornstarch, powdered sugar, and all seasonings in a wide, shallow bowl until completely combined. The addition of cornstarch creates a coating that becomes exceptionally crisp when fried while remaining light rather than heavy or dense.
- Textured Coating:
- Add one tablespoon of the wet brine directly into the dry mixture and whisk lightly. This creates small clumps that attach to the chicken during dredging, resulting in extra craggy texture and crispiness after frying. This professional technique makes a remarkable difference in the final texture.
- Dredging Technique:
- Remove chicken pieces from brine, allowing excess liquid to drip off briefly. Press firmly into the seasoned flour mixture, ensuring complete coverage with no wet spots. Flip and repeat, pressing firmly again to create a substantial coating. Place dredged pieces on a wire rack and allow to rest for ten minutes, which helps the coating adhere properly during frying.
- Perfect Frying:
- Heat oil to exactly 350°F using a reliable thermometer for accuracy. Carefully lower prepared chicken into hot oil and maintain temperature by adjusting heat as needed. Fry for five to seven minutes total, turning halfway through, until deeply golden and internal temperature reaches 165°F. Transfer to wire rack set over paper towels and sprinkle immediately with additional salt while hot.
- Sandwich Assembly:
- While chicken rests, toast buns lightly for textural contrast. Spread homemade sauce generously on both bun halves. Place crispy chicken on bottom bun, then layer with pickles, lettuce, and cheese if desired. Top with remaining bun half and serve immediately while chicken remains at peak crispiness.
 Pin it
My family particularly loves the homemade sauce that accompanies these sandwiches. The combination of sweet honey, tangy mustard, and smoky BBQ sauce creates something magical that enhances the chicken perfectly. My daughter calls it "that orange sauce that makes everything better" and now requests it for nearly everything from roasted vegetables to breakfast potatoes.
Perfect Sauce Pairing
Combine mayonnaise, yellow mustard, honey, and BBQ sauce in a small bowl, whisking until completely smooth. Add sriracha if desired for gentle heat that complements the chicken beautifully. This versatile sauce keeps in refrigerator for up to one week in airtight container. Beyond sandwiches, it makes an excellent dipping sauce for fresh vegetables, french fries, or as spread for wraps and burgers.
Creative Variations
Transform this classic by substituting chicken thighs for even juicier results with richer flavor. For Nashville hot style, brush freshly fried chicken with mixture of melted butter and cayenne pepper before assembling sandwiches. Create Buffalo version by tossing fried chicken in wing sauce before building sandwich, then topping with blue cheese instead of standard sauce.
Storage Solutions
Keep leftover fried chicken in airtight container in refrigerator for up to three days. For best reheating results, place in 375°F oven on wire rack for approximately ten minutes until heated through and exterior recrisps. Avoid microwave reheating which creates soggy coating. Store sauce separately in refrigerator and assemble fresh sandwiches as needed.
 Pin it
The beauty of this pickle brined crispy chicken sandwich lies in how it transforms humble ingredients into something truly special. While it might seem like several steps, each one serves an important purpose in creating that perfect balance of flavors and textures. I've found that taking the time to brine properly and maintain correct oil temperature consistently produces results that have friends and family asking when I'll make them again.
Frequently Asked Questions
- → Can I use chicken thighs instead of breasts for this sandwich?
- Absolutely! The recipe actually mentions you can use either 4 chicken breast pieces or 4 thighs. Thighs will give you a juicier, more flavorful sandwich, while breasts provide a leaner option. Both work beautifully with the pickle brine.
- → Can I bake these instead of frying?
- Yes, you can bake these at 425°F for about 15-20 minutes until the internal temperature reaches 165°F. Spray the breaded chicken with cooking spray before baking for better browning. The texture won't be quite as crispy as fried, but still delicious.
- → What kind of pickle juice should I use?
- The best pickle juice comes from dill pickles (not sweet pickles). You can use the juice from any jar of dill pickles you have on hand. If you're a big fan of a particular brand of pickles, use that juice for a flavor you already know you love.
- → How do I know when the oil is at the right temperature without a thermometer?
- If you don't have a thermometer, drop a small piece of bread into the oil. If it bubbles and browns in about 60 seconds, your oil is around 350°F and ready for frying. The oil should bubble gently around the chicken - if it bubbles too violently, it's too hot.
- → Can I make the chicken ahead of time?
- Yes! You can fry the chicken up to 2 hours ahead and keep it warm in a 200°F oven on a wire rack over a baking sheet. For best results though, these sandwiches are most delicious when assembled and served shortly after frying.