
 Pin it
Pumpkin spice granola with large, satisfying clusters makes for an irresistible autumn treat that you simply cannot stop munching on. This homemade granola combines the rich flavors of pecans, pumpkin seeds, and coconut with the warmth of seasonal spices, all naturally sweetened with pure maple syrup and honey. The result is an addictive crunchy snack that pairs wonderfully with yogurt, milk, or works perfectly eaten by the handful straight from the container when no one is looking.
I discovered this recipe three autumns ago and have made it countless times since. My kitchen transforms with the scent of warm spices and toasty oats. Even my husband, who typically avoids "health foods," regularly raids the jar when he thinks I'm not watching.
Perfect Granola Building Blocks
- Old Fashioned Rolled Oats: Create the foundation for perfect granola texture and substantial clusters
- Pumpkin Seeds: Provide a pleasant nutty flavor complemented by their satisfying crunch
- Pecans: Contribute a buttery richness that's unmistakably autumnal in every bite
- Unsweetened Coconut Flakes: Add subtle tropical notes and delightful texture variation
- Quinoa and Chia Seeds: Incorporate protein boost while creating interesting textural contrast
- Cinnamon, Pumpkin Spice, and Ginger: Blend together for that quintessential fall flavor profile
- Pumpkin Puree: Delivers authentic earthy sweetness and helps clusters bind together
- Maple Syrup and Honey: Create natural sweetness without processed sugar
- Coconut Oil: Helps achieve that perfect golden crispness during baking
- Vanilla Extract and Sea Salt: Enhance and balance all the flavors beautifully
Creating Granola Magic
- Mixing Dry Components:
- Begin by combining oats, pumpkin seeds, pecans, coconut flakes, quinoa, and chia seeds in a large bowl. Add cinnamon, pumpkin spice, and ginger, then stir thoroughly until all dry ingredients are evenly distributed. This ensures each cluster will have balanced flavor.
- Blending Wet Ingredients:
- In a separate bowl, whisk together pumpkin puree, maple syrup, honey, melted coconut oil, vanilla extract, and sea salt until completely smooth. The pumpkin puree might seem resistant at first, but keep whisking until everything integrates into a uniform mixture.
- Combining Everything:
- Pour your wet mixture over the dry ingredients and use a spatula to fold everything together. Continue mixing until all dry components are thoroughly coated with the pumpkin mixture. The mixture should feel slightly sticky and hold together when pressed.
- Creating Cluster Magic:
- For exceptional clusters, gently press teaspoon-sized amounts of the mixture into loose balls before placing them on the baking sheet. This extra step makes a tremendous difference in achieving those coveted large pieces.
- Baking To Perfection:
- Spread your prepared granola in an even layer across two parchment-lined baking sheets. Place in an oven preheated to 325°F and bake for approximately 40 minutes. Every 10 to 15 minutes, carefully flip the clusters rather than stirring them to maintain their integrity. Allow the granola to cool completely on the baking sheets before breaking into pieces, as the cooling process is when they develop their signature crispness.
 Pin it
I personally love adding dried cranberries to this recipe after it cools. Their tartness perfectly balances the sweet, spiced clusters. My grandmother taught me the patience required for properly cooled granola, and it truly makes all the difference between mediocre and magnificent results.
Breakfast Brilliance
Transform your morning routine with this pumpkin granola layered in a parfait glass with Greek yogurt and fresh berries. For a special weekend breakfast, try sprinkling it over pumpkin pancakes with a drizzle of maple syrup. When unexpected guests arrive, serve small bowls with milk as an impressive yet effortless offering that makes your home smell amazing.
Flavor Adventures
Create Mediterranean version by substituting pistachios for pecans and adding dried apricots after baking. Tropical twist lovers might enjoy using macadamia nuts with dried pineapple and extra coconut. For indulgent dessert granola, incorporate dark chocolate chips and dried cherries once the mixture has completely cooled.
Keeping Freshness
Store your finished granola in glass containers with tight-fitting lids to maintain optimal crunchiness. Room temperature storage works perfectly for up to three weeks if properly sealed. Refrigeration extends freshness but might slightly soften the clusters. When granola inevitably loses some crispness over time, simply spread it on a baking sheet and heat in a 325°F oven for ten minutes to restore its delightful crunch.
 Pin it
My journey with this pumpkin spice granola recipe began with plenty of burnt batches and disappointing results. Through countless iterations, I discovered that patience truly matters most with homemade granola. The lower temperature and gentle handling produce clusters that simply cannot be matched by store-bought varieties. Each autumn now begins with several large batches that become gifts for friends and family who have come to expect their annual jar of what my niece calls 'autumn in a bottle.'
Frequently Asked Questions
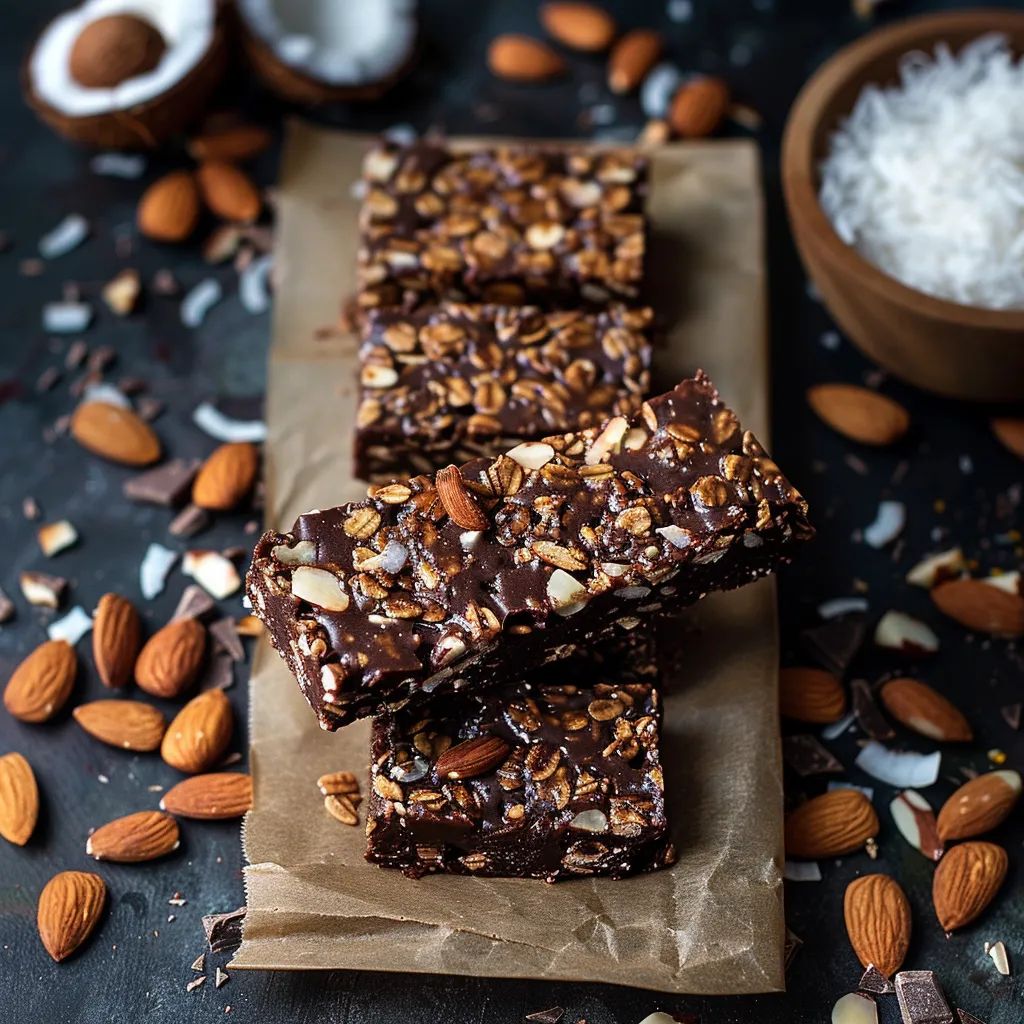
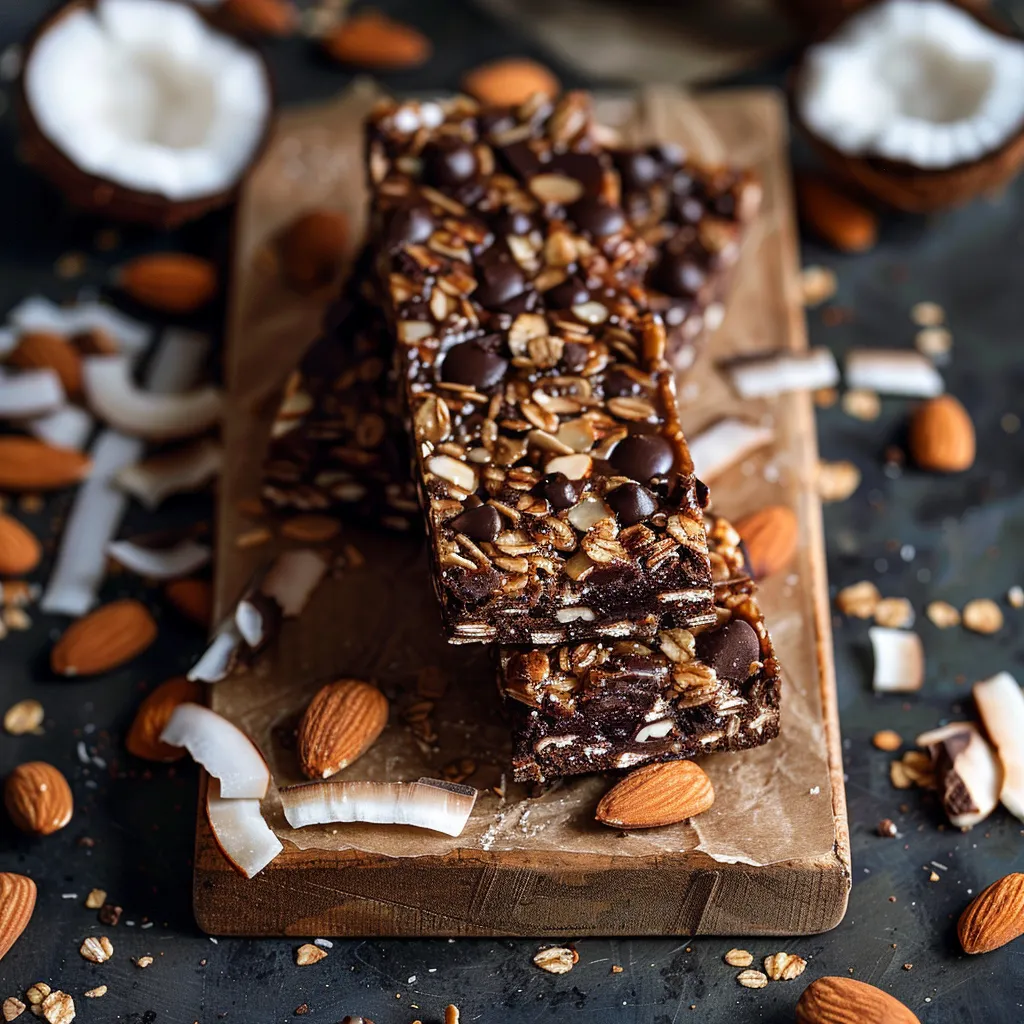
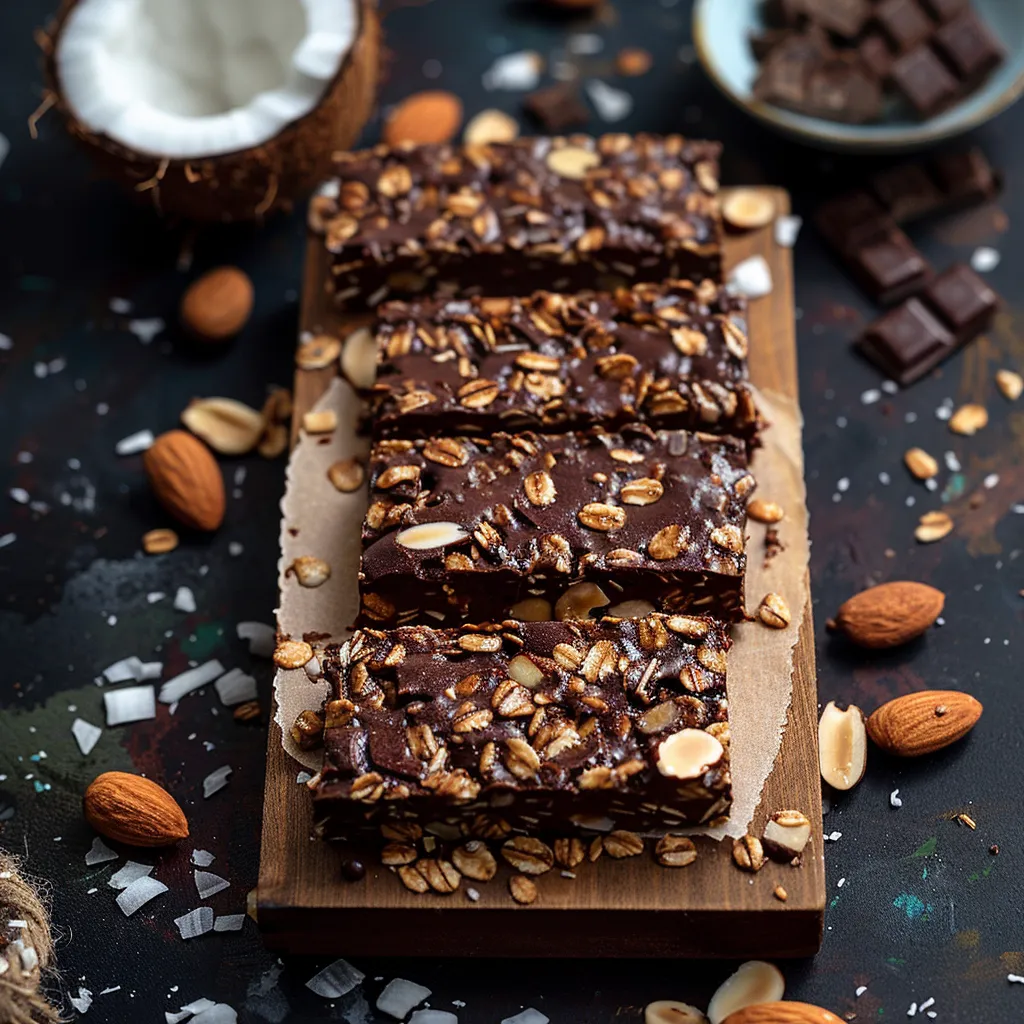
- → Can I make these Almond Joy granola bars vegan?
- Yes, to make these granola bars vegan, simply substitute the honey with an equal amount of pure maple syrup or agave nectar. Also ensure you're using vegan chocolate chips, as many common brands contain milk products. With these two swaps, your Almond Joy granola bars will be completely plant-based.
- → Why do these granola bars need to be stored in the refrigerator?
- These bars need refrigeration because coconut oil, one of the main binding ingredients, becomes liquid at room temperature (about 76°F). Keeping them chilled ensures they maintain their shape and delightful chewy-yet-firm texture. The cold temperature also helps prevent the chocolate from melting, especially in warmer weather.
- → Can I substitute the almond butter with a different nut butter?
- Absolutely! While almond butter complements the Almond Joy flavor profile, you can substitute it with peanut butter, cashew butter, or sunflower seed butter (for a nut-free option). Each will bring its own unique flavor while still providing the necessary binding properties. Just make sure to use a natural nut butter that's well-stirred.
- → How long will these granola bars last in the refrigerator or freezer?
- When stored in an airtight container in the refrigerator, these granola bars will stay fresh for up to 1 week. For longer storage, wrap them individually in parchment paper or plastic wrap and place in a freezer-safe container where they'll keep well for up to 3 months. Allow frozen bars to thaw in the refrigerator for about 30 minutes before enjoying.
- → My granola bars are crumbling when I cut them. What did I do wrong?
- Crumbly bars usually indicate they weren't pressed firmly enough or weren't chilled adequately. Make sure to use significant pressure when packing the mixture into the pan—the flat bottom of a measuring cup works perfectly for this. Also, ensure they're completely cold before cutting. If they're still crumbly, return them to the freezer for another 15 minutes before trying again.
- → Is there a way to make these granola bars without coconut?
- Yes, if you're not a fan of coconut but still want to enjoy these bars, you can omit the coconut flakes and replace them with an equal amount of additional oats, chopped nuts, or seeds like pumpkin or sunflower. For the coconut oil, substitute with the same amount of melted butter or another neutral oil like avocado oil.