
 Pin it
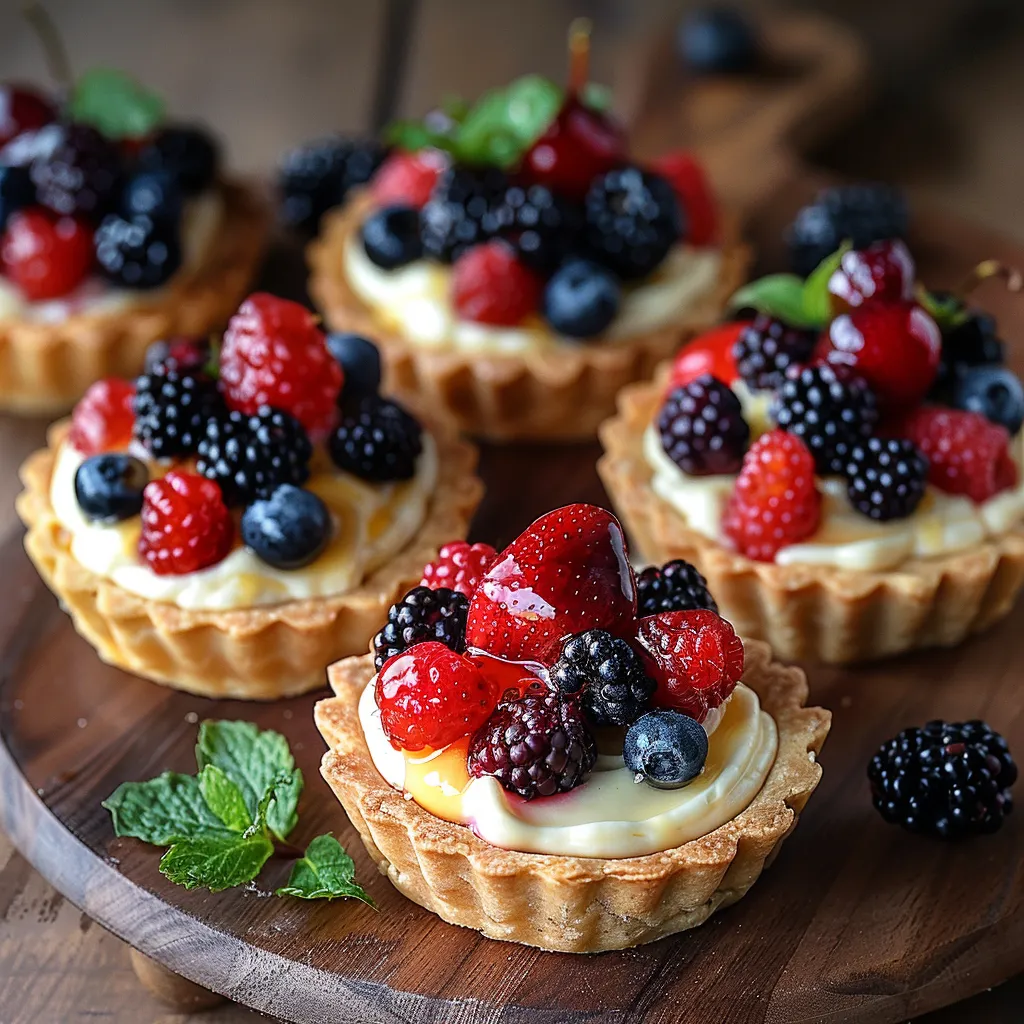
Mini fruit tarts combine buttery pastry shells with luscious vanilla pastry cream and jewel-toned fresh fruits to create an elegant dessert that tastes as beautiful as it looks. These delicate treats deliver the perfect balance of crisp shell, silky custard, and sweet-tart fruit in every bite. Despite their impressive appearance, these petite delights are surprisingly approachable to make, especially when using pre-made tart shells.
I first learned to make pastry cream during a cooking class in Paris years ago. The instructor emphasized that mastering this versatile custard opens the door to countless elegant desserts. After returning home, I began creating these mini fruit tarts for special occasions, and they quickly became my signature dessert. When my sister requested them for her bridal shower instead of traditional cake, I knew they had truly become a family favorite.
Essential Pastry Cream Ingredients
- Granulated sugar: Provides perfect sweetness level
- Farm fresh egg yolks: Create rich custard base
- Cornstarch: Ensures proper thickening without flour
- Whole milk: Contributes essential dairy richness
- Heavy cream: Creates silky luxurious texture
- Cold butter: Adds glossy finish and prevents skin formation
- Vanilla bean paste: Delivers intense flavor with beautiful specks
Perfect Tart Components
- Golden tart shells: Offer crisp, buttery foundation
- Fresh seasonal berries: Provide vibrant color and flavor
- Smooth apricot glaze: Creates professional shine
- Mixed fruits: Create visual and flavor interest
- Additional garnishes: Enhance presentation beautifully
Perfect Preparation
- Egg Mixture Foundation:
- Begin by thoroughly whisking cold egg yolks with granulated sugar in a heatproof bowl. Continue whisking until the mixture becomes noticeably lighter in color and slightly thickened. This initial step incorporates air and begins breaking down sugar crystals for smoother custard.
- Cornstarch Integration:
- Add cornstarch to the egg mixture and whisk until completely incorporated with no visible lumps. The cornstarch provides thickening power without the heaviness of flour, resulting in a silkier final texture. Proper incorporation at this stage prevents lumps later.
- Dairy Warming:
- Combine milk and heavy cream in a heavy-bottomed saucepan over medium heat. Heat gradually, stirring occasionally to prevent scorching, until mixture reaches steaming point with small bubbles forming around the edges. Avoid boiling, which can affect final texture.
- Tempering Technique:
- The critical step of tempering prevents scrambled eggs in your custard. Pour approximately one-third of the hot milk mixture into the egg mixture in a thin, steady stream while whisking constantly. This gradually raises the temperature of the eggs without cooking them prematurely.
- Custard Cooking:
- Return the combined mixture to the saucepan and cook over medium-low heat, stirring constantly with a wooden spoon or heat-resistant spatula. Maintain movement across the entire bottom of the pan to prevent scorching. The mixture will gradually thicken, coating the back of a spoon when properly cooked.
- Finishing Touches:
- Once thickened, immediately remove from heat and stir in cold butter pieces and vanilla bean paste. The cold butter stops the cooking process while adding richness and preventing skin formation. Vanilla bean paste provides superior flavor and visual appeal with distinctive black specks.
- Straining Perfection:
- Pass the custard through a fine-mesh sieve into a clean bowl, pressing gently with a spatula. This step removes any potential lumps or cooked egg bits, ensuring perfectly smooth pastry cream. Cover with plastic wrap pressed directly onto the surface to prevent skin formation.
- Proper Chilling:
- Refrigerate pastry cream for minimum two hours until completely chilled and set. Proper chilling allows flavors to develop fully while achieving ideal piping consistency. This step can be done up to 48 hours in advance for convenience.
- Tart Assembly:
- Fill cooled tart shells with chilled pastry cream, using a piping bag for neat application or carefully spooning it in. Leave slight space below the rim to accommodate fruit toppings. The cream should be smooth and hold its shape without being runny.
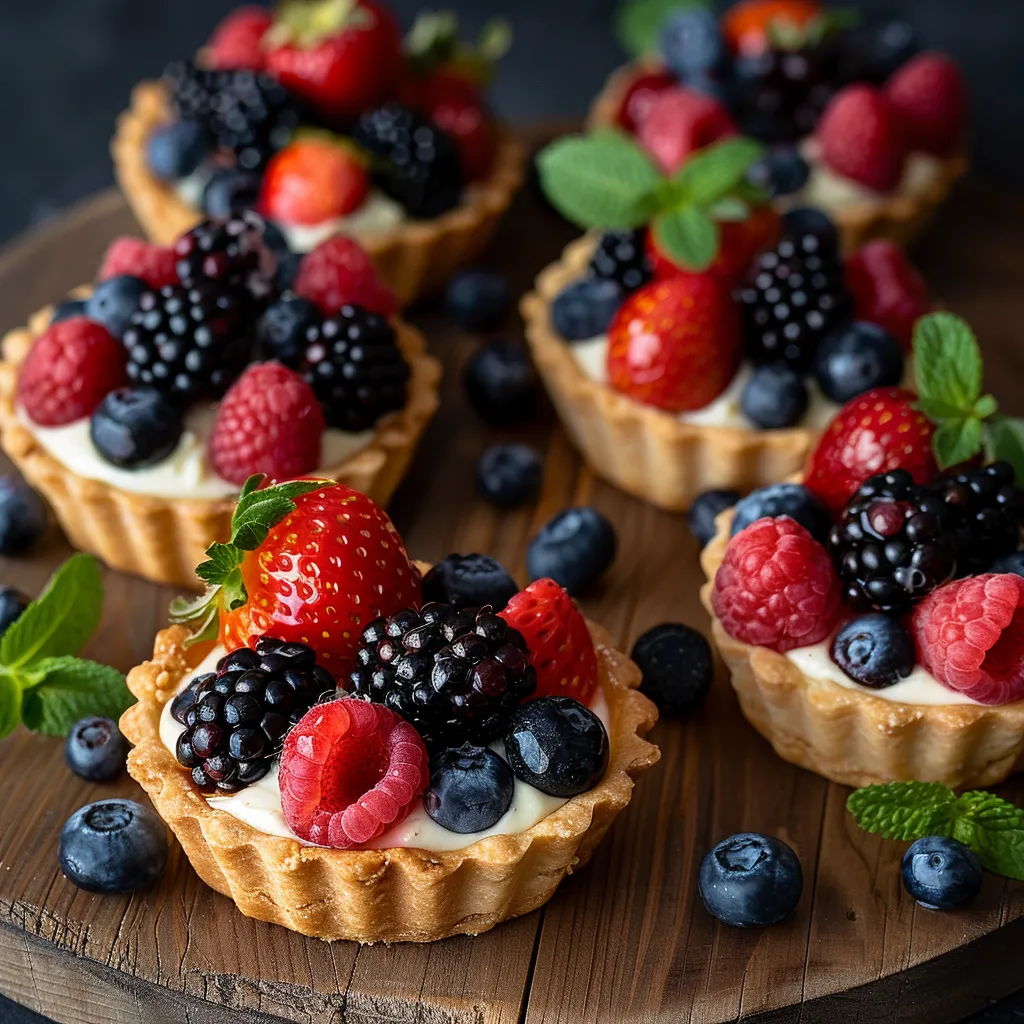
- Artistic Arrangement:
- Place fresh fruits in decorative patterns atop the pastry cream. Consider color contrasts and varying sizes for visual interest. Berries work especially well for their vibrant colors and ability to hold their shape without excess moisture.
- Professional Glaze:
- The secret to professional-looking tarts is the fruit glaze. Gently warm apricot preserves with a small amount of water until fluid, then strain if necessary. Using a pastry brush, delicately apply the glaze to fruits, creating a subtle shine that also helps preserve freshness.
 Pin it
My favorite part about serving these tarts is watching people's reactions to their first bite. There's something magical about the contrast between the crisp shell and silky pastry cream that creates an instant moment of joy. My grandmother always said desserts eaten from small dishes somehow taste better, and these tarts certainly prove her right.
Perfect Presentation Ideas
Arrange tarts on a multi-tiered serving platter for elegant display at special gatherings. Alternate different fruit toppings for visual variety and to accommodate various preferences. For added luxury, dust with confectioners' sugar just before serving or add small mint leaves as garnish. Consider serving alongside espresso or champagne for sophisticated pairings.
Creative Variations
Transform these classic tarts by incorporating citrus zest into the pastry cream for bright flavor dimensions. For chocolate lovers, add two tablespoons of cocoa powder to the cornstarch mixture and top with chocolate shavings. Create seasonal adaptations using poached pears in fall, cranberries during winter holidays, or stone fruits in summer months.
Make-Ahead Solutions
Prepare pastry cream up to 48 hours in advance, keeping tightly covered in refrigerator. Pre-bake tart shells one day ahead, storing in airtight container at room temperature. For partial assembly, fill shells with pastry cream up to 6 hours before serving and refrigerate, adding fruit and glaze just before presentation for freshest appearance.
 Pin it
Frequently Asked Questions
- → Can I make the pastry cream ahead of time?
- Yes! The pastry cream can be made up to 48 hours in advance. Store it in the refrigerator with plastic wrap pressed directly onto the surface to prevent a skin from forming. Before using, whisk it briefly to restore its smooth texture.
- → What options do I have for the tart shells?
- You have several options: use store-bought mini tart shells, make homemade shortcrust pastry shells, use mini phyllo cups, or even create edible cups using sugar cookie dough pressed into a mini muffin tin. Each option offers a different texture and flavor profile.
- → What fruits work best for topping these tarts?
- Berries like strawberries, blueberries, and raspberries work beautifully because they're colorful and don't require much preparation. Other excellent options include kiwi slices, mandarin segments, sliced peaches, mango chunks, and grapes. Choose fruits that aren't too juicy to avoid soggy tarts.
- → Can I substitute the vanilla bean paste?
- Yes, you can substitute vanilla bean paste with pure vanilla extract - just double the amount (use 2 teaspoons instead of 1). However, vanilla bean paste gives those beautiful flecks in the pastry cream and a more intense vanilla flavor that makes these tarts special.
- → How long do assembled fruit tarts keep?
- For best quality, assembled fruit tarts should be enjoyed within 24 hours. The glazed fruit helps extend freshness, but the shell will eventually soften. If you need to prepare components in advance, store the baked shells and pastry cream separately, then assemble shortly before serving.