
 Pin it
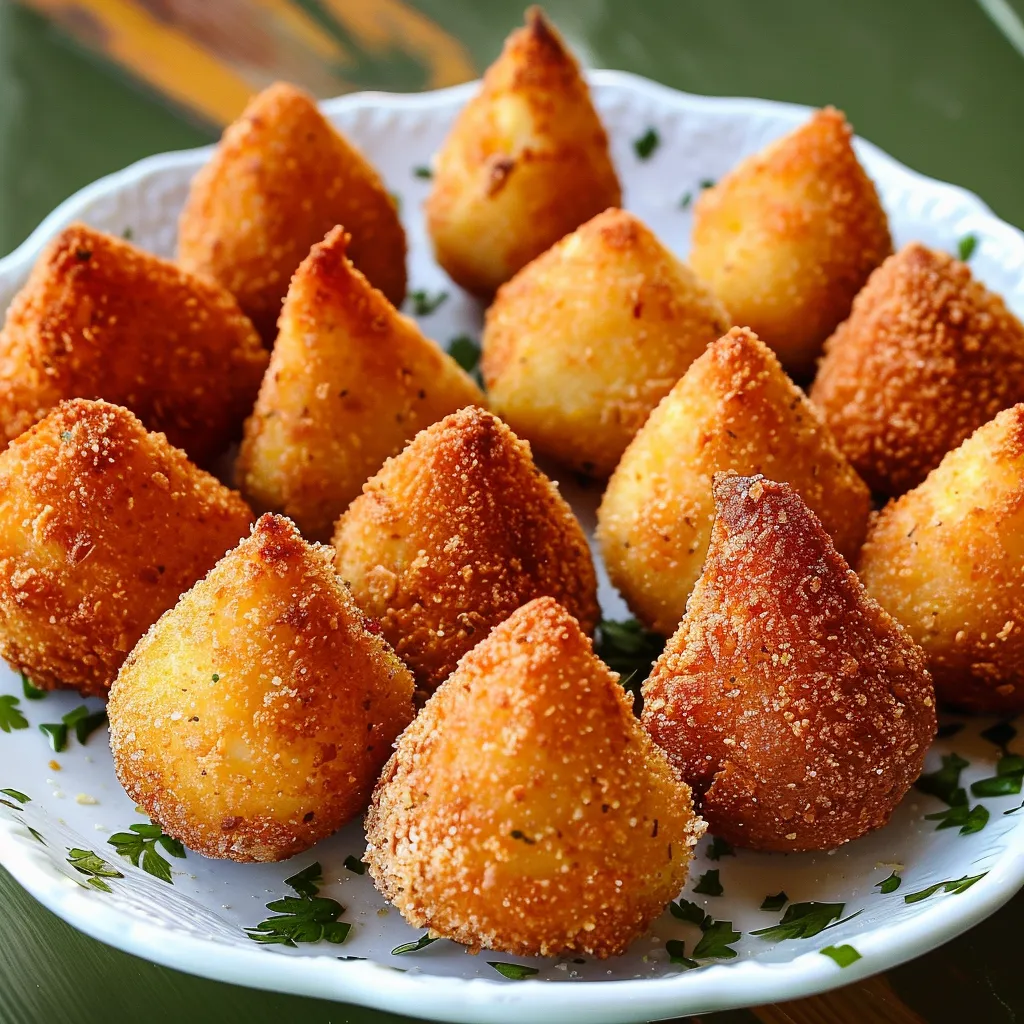
These beloved Brazilian street food croquettes transform simple ingredients into golden-crispy treasures with a creamy, well-seasoned chicken filling. Each coxinha is carefully shaped into its distinctive teardrop form, creating the perfect handheld snack that brings authentic Brazilian flavors right to your kitchen.
After learning this recipe from my Brazilian neighbor, I discovered that the secret to perfect coxinhas lies in the temperature of the dough while shaping - slightly warm dough creates the smoothest finish.
Essential Components
- Boneless chicken breasts: Should be plump and fresh with no discoloration
- High-quality butter: Provides richness and helps create the right dough texture
- Starchy potatoes: Like Russets, they create the ideal dough consistency
- All-purpose flour: With 10-12% protein content ensures proper structure
- Fresh garlic cloves: Should be firm with tight, papery skin
- Sweet onions: Provide subtle flavor without overwhelming
- Premium cream cheese: Adds richness without being too tangy
- Fresh parsley: Brings brightness to the filling
- Fine breadcrumbs: Create the most even coating
Culinary Creation
- Filling Foundation:
- Begin by pressure cooking chicken with aromatic vegetables until perfectly tender. Shred while still warm using two forks, ensuring pieces are uniform but not too fine. Sauté aromatics until golden and fragrant, developing a flavor base. Combine with shredded chicken and seasonings, allowing flavors to meld while cooling.
- Dough Development:
- Boil potatoes until they yield easily to a fork, then mash until completely smooth. Combine liquids and fats in a heavy-bottomed pot, bringing to a careful boil. Add flour gradually, stirring constantly to prevent lumps. Continue cooking until dough pulls away cleanly from pot sides.
- Shaping Artistry:
- Work with dough while still warm but comfortable to handle. Create uniform portions using a scale if available. Press each portion into a thin round, add filling to center, then carefully shape into traditional teardrop form, ensuring no air pockets remain.
- Coating Excellence:
- Create an assembly line with milk and breadcrumbs. Dip each coxinha gently in milk, then roll in breadcrumbs until evenly coated. Press coating lightly to adhere.
 Pin it
My Brazilian grandmother taught me to add a pinch of nutmeg to the filling - it's subtle but adds an intriguing depth that makes people ask for the recipe.
Perfect Preparation Methods
Transform your kitchen into a Brazilian snack shop by setting up an efficient assembly line. Keep the dough covered with a slightly damp cloth to prevent drying while working. Each coxinha should be shaped with gentle but confident movements, creating that classic teardrop silhouette. During frying, maintain oil temperature between 350-375°F (175-190°C) for the perfect golden exterior. Watch for the characteristic bubbling pattern that indicates proper cooking temperature.
Flavorful Variations
Create regional Brazilian variations by incorporating different elements into the filling. For a Minas Gerais style, add fresh corn and catupiry cheese. Develop a spicy northeastern version using malagueta peppers and cilantro. For a modern twist, try adding hearts of palm or sun-dried tomatoes to the chicken mixture. Some families even create a breakfast version using scrambled eggs and bacon as filling.
Storage Mastery
Fresh coxinhas maintain their best texture when stored properly. Allow fried coxinhas to cool completely on a wire rack before storing to prevent condensation. Arrange uncooked, breaded coxinhas in a single layer on a parchment-lined tray to freeze, then transfer to freezer bags. When ready to serve, fry frozen coxinhas directly - no thawing needed, just adjust cooking time. Cooked leftovers can be refreshed in an air fryer at 350°F (175°C) for 3-4 minutes.
 Pin it
Coxinhas represent the heart of Brazilian street food culture - a perfect blend of comfort and craftsmanship. Through years of making these beloved snacks, I've learned that patience during the shaping process and attention to detail during frying yields the most satisfying results. The way the crispy coating gives way to reveal steaming, flavorful filling creates an experience that transports you straight to the bustling streets of São Paulo. Whether served at a casual gathering or as an elegant appetizer, these golden treasures never fail to impress guests and create lasting memories.
Frequently Asked Questions
- → Can I freeze coxinhas?
- Yes, you can freeze breaded coxinhas for up to 2 months. Arrange them on a baking sheet, freeze until solid, then transfer to a freezer bag.
- → Why does my dough stick to my hands?
- If the dough is sticky, lightly oil your hands before shaping. Always keep the dough covered with plastic wrap to prevent it from drying out.
- → How do I get extra crispy coxinhas?
- Use a mixture of water and cornstarch instead of milk for breading. Mix 2 tablespoons of cornstarch with 1 cup of water before coating in breadcrumbs.
- → How long do leftover coxinhas last?
- Store leftovers in an airtight container in the fridge for up to 3 days. Reheat at 350°F for 10 minutes to restore crispiness.
- → What's the best way to fry coxinhas?
- Fry in small batches of 4-5 at a time in oil hot enough to cover them. Cook for 3-4 minutes per side until golden brown.