
 Pin it
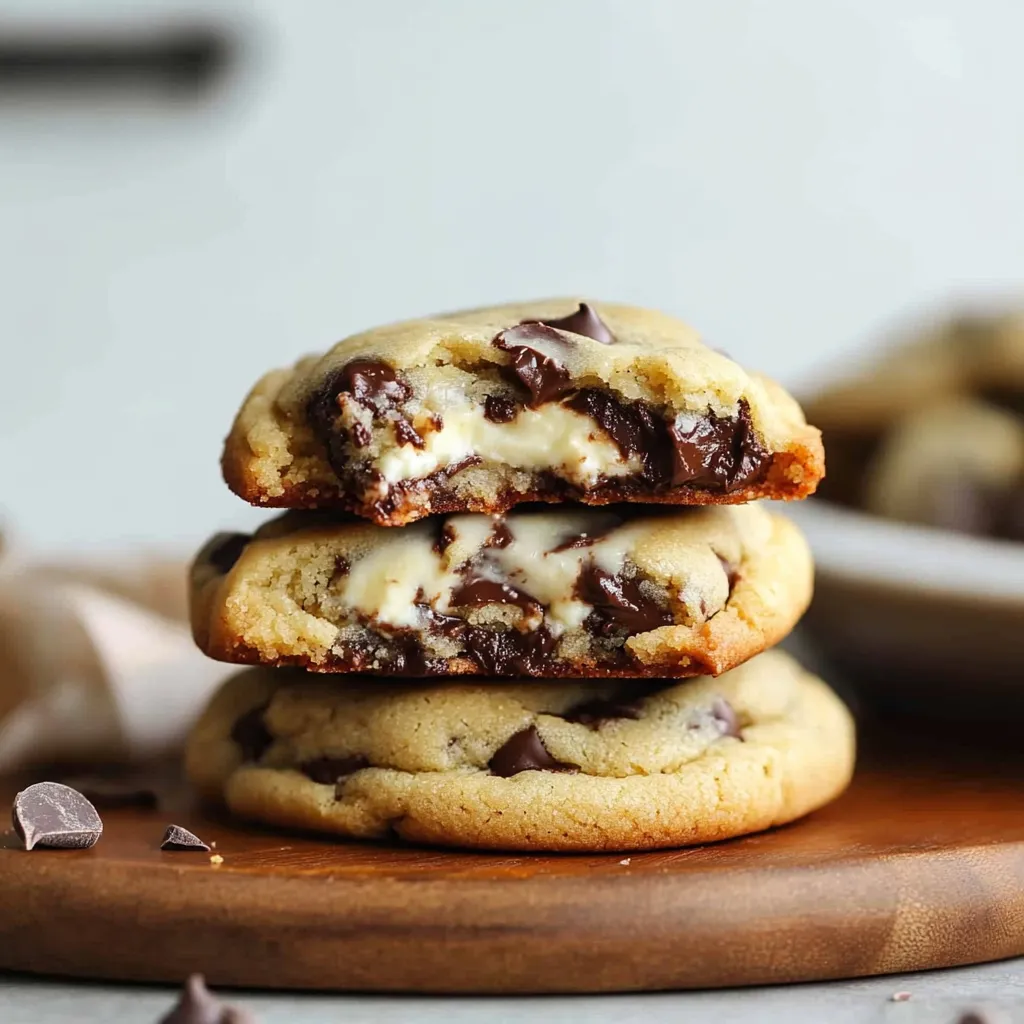
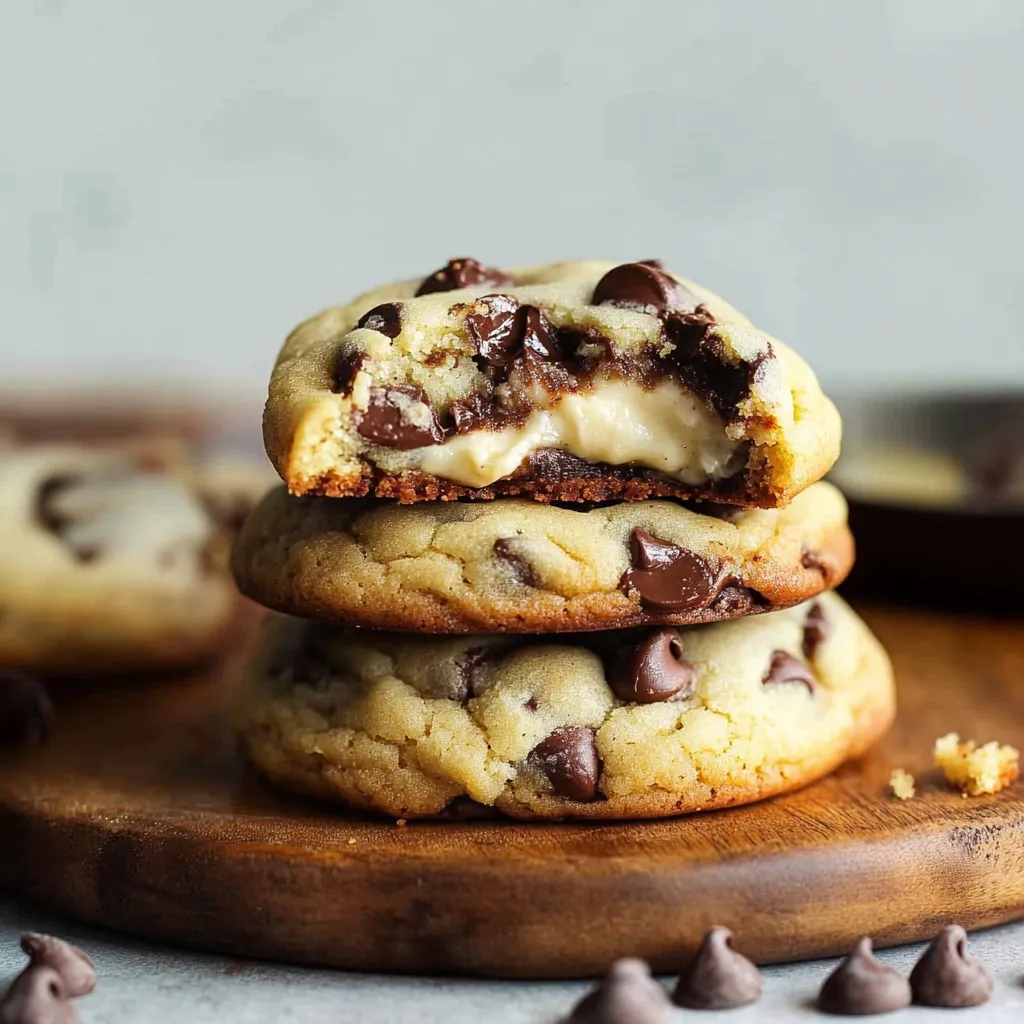
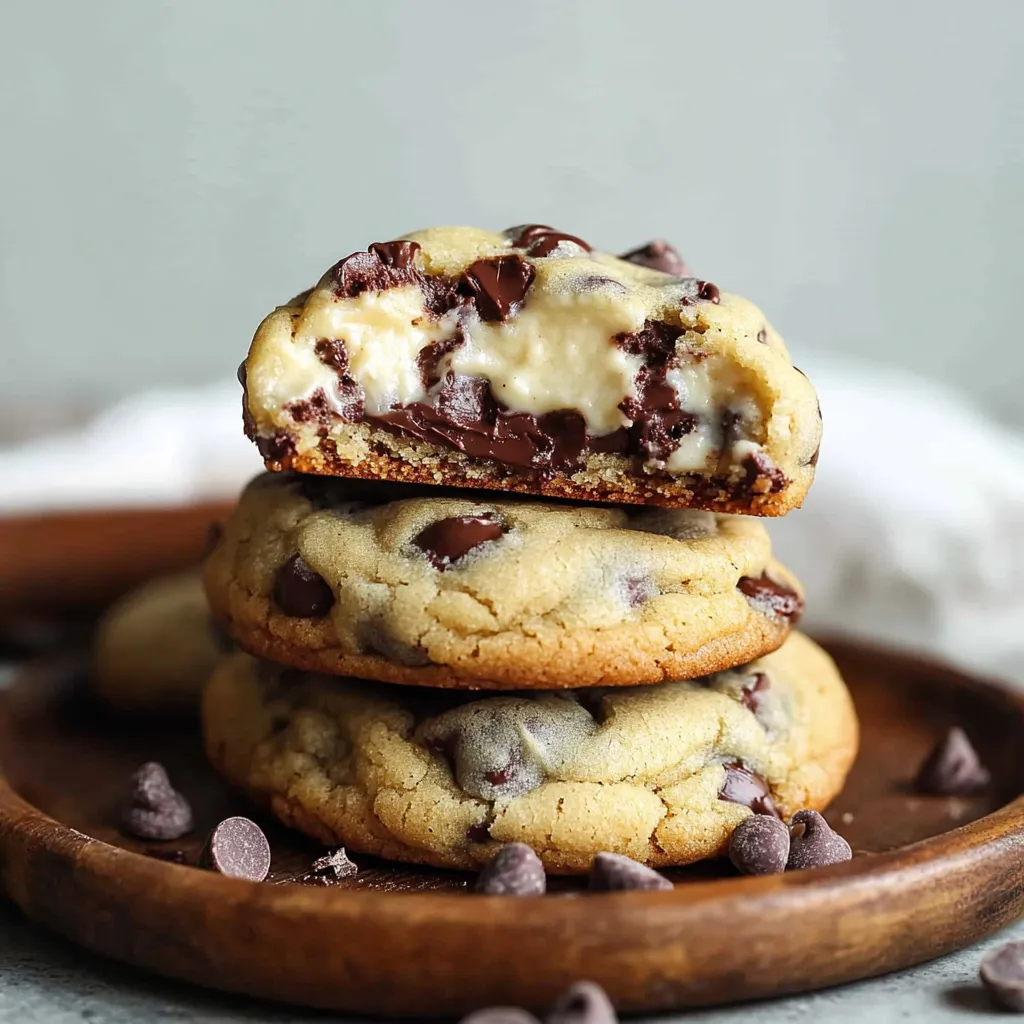
Imagine biting into what appears to be a regular chocolate chip cookie, only to discover a luxuriously creamy cheesecake center hiding inside. These Cheesecake Stuffed Chocolate Chip Cookies have become my ultimate crowd-pleaser, combining two beloved desserts into one irresistible treat. After perfecting this recipe in my kitchen, I can tell you that the moment when someone discovers the creamy surprise inside is pure magic.
I first made these for my son's bake sale, and they sold out within minutes. Now they're requested at every family gathering, and I always keep a batch in the freezer for unexpected guests.
Essential Ingredients and Selection Tips
- Cream Cheese: Philadelphia full-fat cream cheese works best. It should be cold and cubed for the perfect filling texture.
- Butter: Use quality unsalted butter at room temperature. I've found European-style butter creates an exceptionally rich cookie.
- Chocolate Chips: Choose high-quality semi-sweet chips that hold their shape while baking. I prefer Ghirardelli for their perfect size and melt.
- All-Purpose Flour: Measure by spooning into the cup and leveling off - don't scoop directly with the measuring cup.
- Brown Sugar: Pack it firmly in the measuring cup for accuracy. Fresh brown sugar makes a noticeable difference in texture.
Detailed Step-by-Step Instructions
- Filling Preparation (15 minutes):
- Cut cold cream cheese into small cubes for easier mixing. Beat with powdered sugar until completely smooth - no lumps! Chill mixture for at least 30 minutes until firm. Shape into small balls using a melon baller or teaspoon.
- Cookie Dough Creation (20 minutes):
- Beat room temperature butter until creamy (about 2 minutes). Add both sugars and cream until light and fluffy (3-4 minutes). Mix in vanilla, egg, and extra yolk until just combined. Gradually add dry ingredients, scraping bowl frequently. Fold in chocolate chips gently.
- Assembly Process (30 minutes):
- Scoop dough using a medium cookie scoop. Create a well in each dough ball. Place a chilled cream cheese ball in the center. Carefully wrap dough around filling, sealing completely. Roll between palms until smooth. Top with extra chocolate chips.
- Baking Method (12-15 minutes per batch):
- Place on parchment-lined sheets 2 inches apart. Bake at exactly 350°F until edges are lightly golden. Let cool on baking sheet for 5 minutes. Transfer to wire racks to cool completely.
 Pin it
My daughter loves helping me make these, though we learned the hard way that tiny fingers need to be extra careful sealing the cream cheese inside completely. Some of our early 'cream cheese explosions' are now funny family memories!
Perfecting Your Technique
I've discovered that chilling the filled cookies for just 15 minutes before baking helps them keep their shape better. After many batches, I've also found that slightly flattening the tops before baking creates that perfect bakery-style look with natural cracks on top.
Storing Your Creation
These beauties need special care because of their creamy centers. Store them in airtight containers with wax paper between layers in the refrigerator. Let them come to room temperature for about 10 minutes before serving - the filling becomes perfectly creamy, and the cookie stays pleasantly chewy.
 Pin it
Troubleshooting Common Issues
Sometimes the filling can leak during baking if not properly sealed. After years of making these, I've learned to double-check each seal and keep the cream cheese balls small. When I teach this recipe in my baking classes, this is the step we practice most carefully.
Creative Variations
While the classic version is amazing, I love experimenting with different flavors. During the holidays, I add peppermint extract to the filling. For summer parties, I've mixed in lemon zest, and my chocolate-loving friends adore when I add cocoa powder to the cookie dough.
After countless batches of these cookies, they've become more than just a recipe - they're part of our family's story. Whether it's for after-school treats, holiday gatherings, or just because we need something special to brighten our day, these cheesecake-stuffed cookies never fail to bring smiles. The combination of crispy cookie edges, chewy centers, and that surprise cream cheese filling makes every bite an adventure worth sharing.
Remember, the key to perfect cookies is patience and attention to detail. Take your time with the assembly, and don't rush the process. As my grandmother always said, 'Good things come to those who bake with love!' These cookies are proof of that wisdom.
Frequently Asked Questions
- → How do I store these cookies?
- Store in an airtight container in the fridge for up to 5 days, or briefly at room temperature overnight.
- → Can I freeze these cookies?
- Yes, freeze baked cookies in an airtight container for up to 3 months. Thaw in the fridge overnight.
- → Why do they need to be refrigerated?
- Due to the cream cheese filling, refrigeration keeps them fresh and food-safe longer.
- → Can I make the dough ahead of time?
- Yes, prepare the dough and filling separately, refrigerate both, then assemble and bake within 24 hours.
- → How do I know when they're done baking?
- The edges should be golden brown and the tops just set after 9 minutes, even if they look slightly underbaked.