
 Pin it
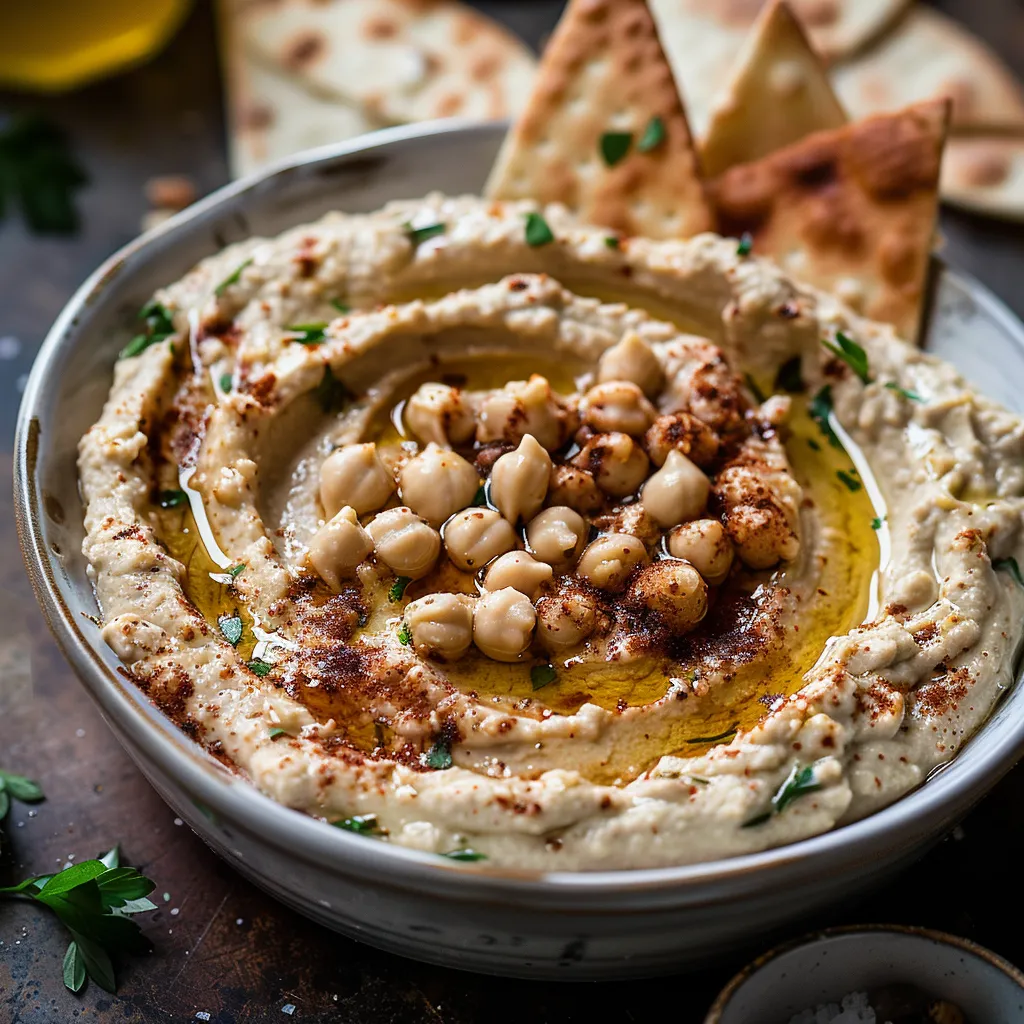
Extra smooth hummus transforms ordinary chickpeas into a velvety, luxurious dip that rivals any restaurant version you've tasted. The secret lies not in fancy ingredients but in technique, particularly the magical combination of baking soda and proper processing. This hummus achieves that elusive silky texture that makes you wonder why you ever bothered with store bought varieties.
I discovered the baking soda technique years ago after a trip to Jerusalem where the hummus was unlike anything I'd tasted before. After numerous experiments, this method consistently produces that same ethereal texture. My neighbor who claimed he "never liked hummus" became an instant convert after trying this version, and now requests it for every gathering.
Essential Hummus Ingredients
- Canned chickpeas: Offer convenience without sacrificing quality
- Chickpea liquid: Provides perfect consistency adjustment
- Baking soda: Works magic by softening chickpea skins
- Fresh garlic: Delivers essential aromatic foundation
- Premium tahini paste: Creates luxurious creaminess
- Fresh lemon juice: Balances richness with bright acidity
- Quality olive oil: Adds silky mouthfeel and richness
- Kosher salt: Enhances all flavors harmoniously
- Ground cumin: Contributes earthy warmth throughout
Perfect Preparation
- Chickpea Transformation:
- Begin with drained, rinsed chickpeas, reserving some liquid for later use. Place chickpeas in a medium saucepan with fresh water and baking soda. This crucial ingredient raises the pH level, helping break down the tough outer skins. Bring to a boil, then reduce to simmer for ten to twelve minutes until chickpeas become visibly soft and skins float to surface.
- Thorough Rinsing:
- Once chickpeas reach proper softness, drain in colander and rinse thoroughly under cold running water. This removes any remaining baking soda taste and stops the cooking process. Gently rub chickpeas between your hands to loosen remaining skins. While removing all skins isn't necessary, removing loose ones contributes to ultimate smoothness.
- Tahini Foundation:
- In clean food processor, combine garlic, tahini, and lemon juice as the first processing step. This creates an emulsified base before adding chickpeas. Process for one to two full minutes until mixture becomes noticeably lighter in color and incredibly smooth. This separate step prevents grainy texture in finished hummus.
- Gradual Incorporation:
- Add half the prepared chickpeas along with olive oil, salt, and cumin to the tahini mixture. Process continuously until completely smooth before adding remaining chickpeas and additional liquid. This gradual approach prevents overtaxing the food processor while ensuring each addition becomes perfectly incorporated.
- Texture Perfection:
- After adding all chickpeas, continue processing while drizzling additional reserved liquid or ice water until desired consistency develops. The hummus should flow slowly when tilted but maintain structure. For ultimate smoothness, allow processor to run continuously for three to five minutes, stopping occasionally to scrape down sides.
- Proper Resting:
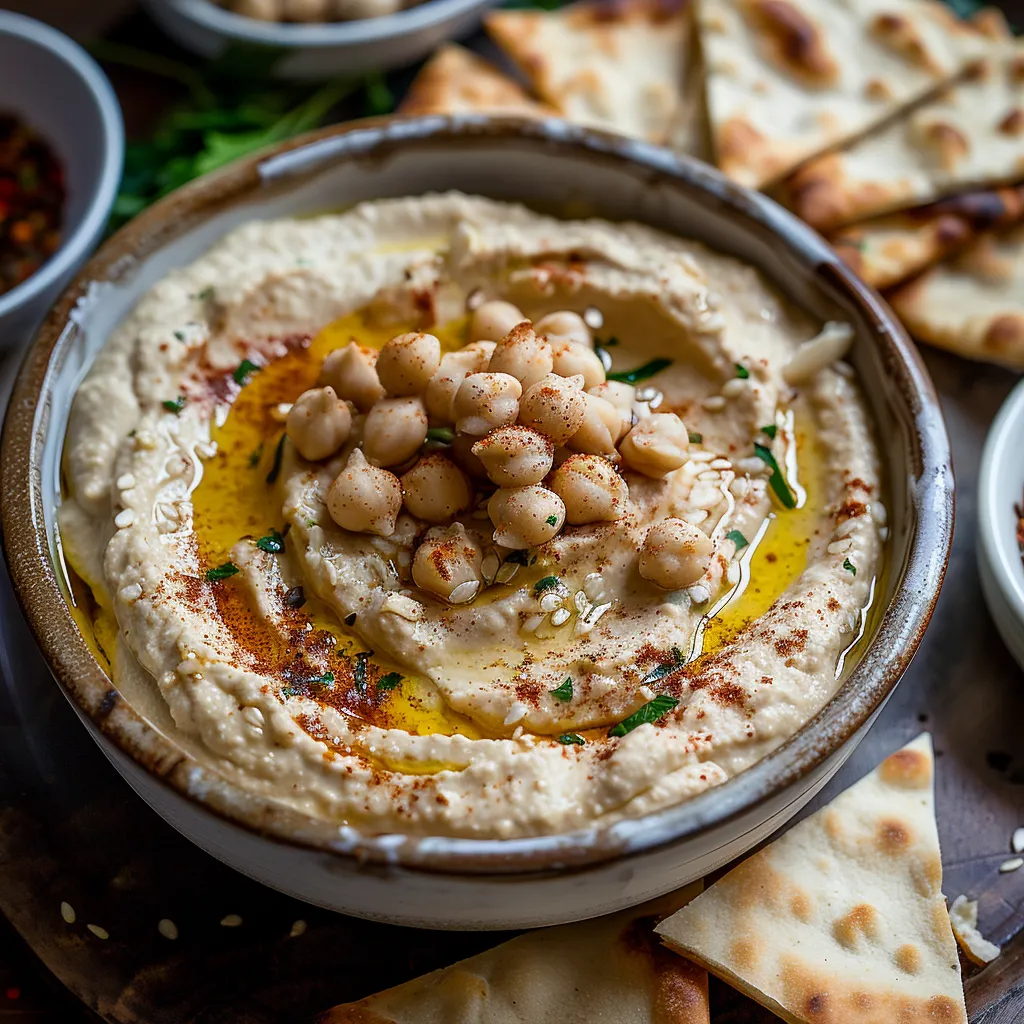
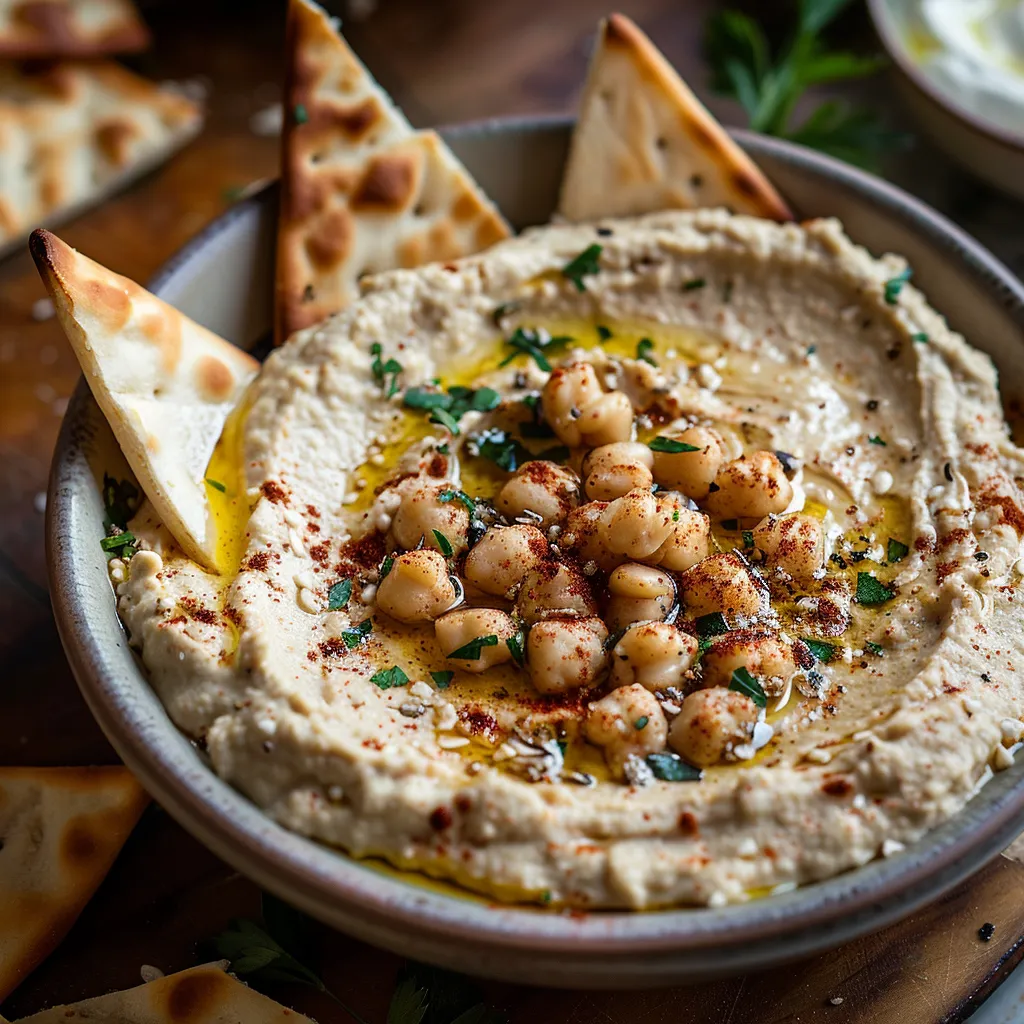
- Transfer finished hummus to serving bowl and allow to rest at room temperature for fifteen to thirty minutes before serving. This resting period allows flavors to meld and texture to settle. For serving, create a shallow well in center and fill with high quality olive oil, then sprinkle with chosen garnishes.
 Pin it
I particularly love serving this hummus with warm, freshly baked pita bread for an authentic experience. The contrast between the warm bread and cool, creamy hummus creates something truly special. My daughter calls this our "Sunday special" as it's become our traditional weekend lunch alongside fresh vegetables and olives, creating our own little Mediterranean feast at home.
Wonderful Serving Suggestions
Create a Mediterranean mezze platter with this hummus as the centerpiece, surrounded by warm pita bread, marinated olives, feta cheese, and fresh vegetables. Spread a generous layer on flatbread as the base for grilled vegetables and herbs for a quick lunch. Use as a sandwich spread instead of mayonnaise for added protein and flavor in everyday meals.
Creative Variations
Transform this classic recipe by adding roasted red peppers for a sweet, smoky flavor profile. For herb lovers, incorporate fresh cilantro and parsley during the final blending stage. Create a spicy version by adding harissa paste or roasted jalapeños. For visual impact, swirl pesto, olive tapenade, or roasted garlic oil into the surface before serving.
Storage Solutions
Keep freshly made hummus in airtight container in refrigerator for up to five days. If texture thickens during storage, rejuvenate by stirring in one tablespoon warm water before serving. Freeze portions in small containers for up to three months, thawing overnight in refrigerator and stirring well before serving. For best flavor, allow refrigerated hummus to sit at room temperature for fifteen minutes before enjoying.
 Pin it
The beauty of this extra smooth hummus lies in its elegant simplicity. While the process includes a few extra steps beyond opening a container from the store, the difference in texture and flavor makes it entirely worthwhile. This recipe reconnects us with ancient culinary traditions while fitting perfectly into contemporary meals, proving that sometimes the oldest recipes truly are the best when executed with care and attention.
Frequently Asked Questions
- → Why is removing the chickpea skins important for smooth hummus?
- The skins of chickpeas contain a lot of fiber that can create a grainy texture in hummus. Removing them is the key to achieving that ultra-smooth, creamy restaurant-style consistency that's often missing in homemade versions. The baking soda technique in this recipe makes removing those skins much easier.
- → Can I make this hummus without tahini?
- While tahini is a traditional and important flavor component in hummus, you can make a tahini-free version if needed. Substitute with 2-3 tablespoons of Greek yogurt, a few extra tablespoons of olive oil, or even a couple tablespoons of sesame oil (for a similar flavor profile). The texture and taste will be different, but still delicious.
- → How long does homemade hummus last in the refrigerator?
- This homemade hummus will keep well in an airtight container in the refrigerator for 4-5 days. The flavor actually improves after the first day as the ingredients meld together. For the freshest taste, don't drizzle the top with olive oil until ready to serve.
- → Can I freeze homemade hummus?
- Yes, hummus freezes surprisingly well! Store it in an airtight container with a thin layer of olive oil on top to prevent freezer burn. Freeze for up to 3 months. Thaw overnight in the refrigerator, then stir well and add a splash of lemon juice and a drizzle of fresh olive oil to refresh the flavors.
- → What can I add to hummus for different flavors?
- The beauty of this smooth hummus base is how versatile it is. Try adding roasted red peppers, roasted garlic, sun-dried tomatoes, jalapeños, or herbs like cilantro or basil. You can also top it with spiced ground meat, pine nuts, za'atar, sumac, or harissa for different flavor profiles.